Wednesday, December 23, 2009

Crab & Cream Cheese Popovers


This recipe is adapted from the 2009 Canadian Living Holiday Cookbook. The popovers are easy to make and they taste wonderful. They are savoury and chewy with a soft, warm surprise in the centre.

2 eggs
1 cup flour (I used whole wheat)
1 cup milk
2 tbsp butter, melted
1/2 tsp salt
1/4 tsp pepper
1/2 tsp coriander
1/4 tsp cumin
1/4 tsp nutmeg
1/3 cup finely chopped green onion, plus another 1 tbsp, reserved
1/3 cup finely chopped red onion
1 small jalapeno pepper, minced
1 can crabmeat, drained
1/2 brick (125g) cream cheese, room temperature
splash of lemon juice

1. In a large bowl, whisk together eggs, flour, milk, butter and seasonings until smooth and frothy. Mix in green onion, red onion and jalapeno pepper. Cover and refrigerate for 2 hours (or up to 24 hours).

2. Meanwhile, Mix crab, cream cheese, reserved green onion and lemon juice in a small bowl. Add a pinch of salt and pepper. Set aside.

3. Pre-heat oven to 425 degrees F. Spray mini muffin tins with cooking spray.

4. Remove batter from fridge and gently whisk. Spoon batter into muffin cups to fill halfway. Add rounded teaspoon of crab mixture to centre of each muffin cup. Spoon remaining batter over top of the crab mixture to fill the muffin cups.

5. Bake in oven for 16-18 or until golden and puffed. Serve warm. Can be made ahead and refrigerated for up to 2 days or frozen for up to 2 weeks. Re-heat in 400 degree F. oven for 5-10 minutes.

Wednesday, December 16, 2009

Pot Roast Pizza


Pizza B.C. (before cheese and before cooking)

Pot roast and pizza? An odd combination for sure. It came to be one day when I had some left over slow cooker pot roast, a pizza shell and a hungry tummy. The slow cooker pot roast was so flavourful and fall-apart-fantastic that it suited the top of my pizza just perfectly. Add to that some diced onion, zucchini and some sliced mushrooms and you have a comfort food feast.

1 pizza crust - store bought or homemade. Whatever suits your fancy
1 cup pizza sauce - ditto on the above
1 small chunk of left over pot roast, pulled apart into small pieces
1/2 small zucchini, sliced and quartered
1/2 small red onion or 1 small shallot, sliced thin
3-4 button mushrooms, sliced
1/2 cup shredded cheese of your choice (I used a Tex-Mex blend tonight!)

1. Do you really need directions?


Pizza P.C. (post cheese and post cooked) and topped with fresh parsley

Tuesday, December 15, 2009

Holiday Gifts from the Kitchen - Limoncello Liqueur


Limoncello is a sweet Italian liqueur. It is easy to make and tasty to drink. The traditional way to enjoy this treat is ice cold, straight up in a shot glass. Or try it in a martini. My favourite Limoncello martini recipes follow below.

Limoncello Liqueur:

8 organic lemons
1 750ml bottle vodka
2 1/2 cups water
2 cups sugar

1. Wash lemons with a vegetable brush in hot water. Rinse well. Using a vegetable peeler or zester, peel off the rind, avoiding the white pith. The pith is bitter tasting and will affect the outcome of your Limoncello. You can also grate the zest using a Microplane, just be careful to only grate the yellow skin and not the white pith. If you end up with pith on the back of your rind, gently scrape it off using a paring knife.

2. Place the rind in a large airtight jar. Pour in vodka and seal the jar. Leave vodka in a cool dark place for at least five days and up to thirty days. The longer you leave the mix to steep, the better. The more time it has, more lemon flavour will be infused and the vodka will become brighter yellow.

3. After steeping your vodka for the desired length of time, prepare a simple syrup by mixing 2 1/2 cups of water with 2 cups of sugar. Bring to a boil and simmer gently for 10-15 minutes until sugar is all dissolved and mixture has thickened. Let cool to room temperature.

4. Mix the cooled simple syrup with the vodka/lemon mixture. Re-seal and allow to rest in a cool, dark place for another five to thirty days. If you are in a rush, you can skip the second rest period, go right to the straining in step five and instead allow the mixture to rest after it has been strained.

5. After the second rest period, strain the mixture through a coffee filter or cheesecloth lined funnel into bottle of your choice. Discard the lemon rind.

6. Store finished Limoncello in a cool, dark place for up to one year. "Connoisseurs" advocate storing your Limoncello in the freezer until ready to serve. I DO NOT advocate storing yours in the freezer because, as I learned, it actually freezes! A cold fridge is sufficient enough.


When giving as a gift, I include a scroll of Limoncello drink recipes. Here are some of my favourites:

Limoncello Limon Blush Cocktail:
1 oz Limoncello
3 oz lemonade
½ oz cranberry juice
½ oz soda water
1 lemon wedge for garnish

Add first three ingredients to a cocktail shaker with ice. Shake vigorously and strain into a tall glass filled with ice or a chilled martini glass. Top with soda and garnish with a lemon wedge.

Killer Limoncello Martini:
1.5 oz vodka
1 oz Limoncello
½ oz lemon juice
Lemon wedge or lemon peel spiral

Combine liquid in a cocktail shaker with ice. Shake vigorously and strain into a martini glass. Garnish with lemon peel or wedge.

Limoncello Fizz:
1 oz Limoncello
3 oz soda water
1 oz Ginger Ale
Squirt of lemon juice
Lemon wedge for garnish

Mix all ingredients in a tall glass filled with ice. Stir well and serve with a lemon wedge.

Monday, December 14, 2009

Holiday Gifts from the Kitchen - Vanilla Vodka


This is one of the easiest homemade Holiday gifts. It is a little on the expensive side when it comes to homemade gifts, only because vanilla beans are not cheap but the expense is worth it.

In case you are wondering, I bought my glass flasks at The Container Store. They offer a wide assortment of glass bottles and jars.

Vanilla Vodka:

Per 250ml glass jar, you will need:

1 vanilla bean
250 ml vodka (cheaper the better!)
1/2 tsp pure vanilla extract
1 coffee filter

1. Split vanilla bean. Using a small knife, run the blade up the bean to remove the seeds.

2. In a large re-sealable container, add vodka, vanilla bean and extracted vanilla seeds. Cover and store in a cool, dark place for 1-2 weeks.

3. After 1-2 weeks, set up a funnel on the glass jar and line with a coffee filter. Strain the vodka through a coffee filter, into the jar. Add pure vanilla extract. Place the vanilla bean in the jar and seal.

4. Store in a cool, dark place for up to 1 year.

Incidentally, if you concentrate the vanilla flavour (reduce the amount of vodka and increase the amount of vanilla beans), you will eventually create homemade vanilla extract!

Saturday, December 12, 2009

Holiday Gifts from the Kitchen - Peanuty Chocolate Oreo Cookie Bark


This is another recipe from the Kraft Kitchens. I've made this one for a few years now and it is very easy and very good. Who doesn't like chocolate, peanut butter and Oreo cookies!?

1 box (8 squares) BAKER'S Semi-Sweet Chocolate
1 box (6 squares) BAKER'S White Chocolate
2 Tbsp Smooth Peanut Butter (I used 3)
10 OREO Cookies, smashed

1. PLACE semi-sweet chocolate and white chocolate in separate medium microwaveable bowls. Microwave until completely melted, following directions on package. Add peanut butter to white chocolate; stir until well blended. Crumble half the cookies over chocolate in each bowl; mix well.

2. DROP spoonfuls of the chocolate mixtures onto waxed paper-covered baking sheet, alternating the colours of the chocolates. Swirl gently with knife. Top with more crumbled cookies.

3. REFRIGERATE 1 hour or until firm. Break into pieces. Store in airtight container in refrigerator.

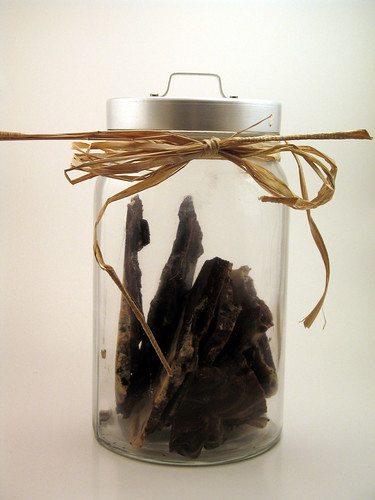
I alternate between serving the bark in glass jars (as shown) or Christmas Asian-style take out boxes (below).

Variation: Instead of peanut butter & Oreos, use dried cranberries and chopped macadamia nuts. I made a batch using cherry flavoured dried cranberries and dry roasted macadamia nuts. It created a sweet and salty treat, perfect for someone that prefers salty snacks.


Thursday, December 10, 2009

Holiday Gifts from the Kitchen - Accidental Toblerone Fudge Sauce

Hello! I've taken some time off cooking. Well, that isn't exactly true. I'm still cooking but nothing has been deemed worth of posting here. Although the pot roast, mushroom and zucchini pizza I made last night was pretty delicious.

With only two weeks till Christmas, I've been very busy. My shopping is all done. My presents are all wrapped and my Christmas crafting is nearly complete. I don't usually bake around Christmas time. I'm not much of a baker. I'm more of a creator. This year I created homemade Limoncello liqueur, Vanilla Vodka, Toblerone Fudge Sauce and Peanuty Oreo Cookie Bark. The results are pretty darn good, in my opinion.


Today I will share my Accidental Toblerone Fudge Sauce. Accidental because I set out to make a KRAFT Kitchen's Toblerone Fudge recipe. Unfortunately my fudge didn't set and I needed to come up with something to salvage the $10 worth of chocolate that was in my pan. This recipe is not healthy. It isn't wholesome. It isn't cheap. But it is sinfully delicious. That is why I'm giving almost all of my fudge sauce away as gifts.

If you are interested in the original Toblerone Fudge recipe, check here.

Jill's Accidental Toblerone Fudge Sauce:

Yields about 8 cups - Enough to fill 4 - 500ml canning jars

1 cup sugar
1 cup butter
3 cups full fat evaporated milk (about 2 large cans)
600g Toblerone (That is one full and a one half of the 400g large holiday bars or 6 smaller 100 g bars)
6 squares bakers chocolate (semi-sweet or bitter-sweet)

1. Coarsely chop all chocolate and set aside.

2. Mix sugar, butter and evaporated milk in a sauce pan. While stirring constantly, slowly bring to a rolling boil over medium heat. Let boil for five minutes will continuing to stir.

3. Remove sauce pan from heat. Pour chopped chocolate into sauce pan and stir until completely melted.

4. Let cool to room temperature. Sauce should be of a thick consistency and coat the back of a spoon, yet still pour easily. If sauce is too thick, stir in more condensed milk, 1/4 cup at a time. If sauce is too runny, more chocolate may need to be added.

5. Spoon or pour sauce into airtight jars. I used 500ml canning jars and boiled them after, per box instructions, to form a proper airtight seal.

6. Store jars in refrigerator.

Chocolate Sauce Uses:
- Heat a bit in the microwave and spoon over ice cream, cream puffs, pancakes and other desserts.
- Add to milk for rich and creamy chocolate milk
- Serve as is over ice cream

Tuesday, November 24, 2009

Easy Chicken Noodle Soup

Sorry I've been MIA. I was sick, out of town and then my internet connection crashed for an entire week! Health and internet are all better now. This recipe emerged while I was sick and in need of a quick fix comfort dish. Easy peasy.

1 carton chicken stock
1 carrot, peeled and diced small
1 celery stalk, diced small
1/2 of 1 white or red onion, diced
1 chicken breast, pre-cooked & diced*
pinch of salt & fresh cracked pepper
1 tsp parsley
1 tsp oregano
1 clove garlic, minced
1 cup macaroni noodles, pre-cooked**

*Cook your chicken breast in a 350 degree F. oven for 10-15 minutes.

**Ensure to pre-cook your noodles! Adding uncooked noodles to your soup will reduce the broth amount as well as release starches and thicken your broth. That's bad news!

1. Add everything to a soup pot and simmer for 20 minutes.

2. Top with fresh chopped parsley if you'd like.

Et Voila!

Monday, November 23, 2009

Brie En Croute with Cranberry Apple Walnut Compote

Another appieI created for my Aunt's 50th birthday bash. Another appie with no photo. C'est la vie! This was another hugely successful and popular dish. My cousin remarked that it tastes like Christmas. That's always a bonus!

Cranberry Apple Walnut Compote:

1 cup fresh or frozen cranberries
2 apples - peeled, cored and diced
Zest of 1 small orange (or half 1 large)
1/2 cup apple cider
1/2 cup cranberry sauce
1 tbsp agave syrup or honey
2 cinnamon stick
pinch nutmeg
1/4 cup chopped walnuts

1. In saucepan combine cranberries, apple, orange rind and juice. Bring to boil, stirring.

2. Reduce heat to simmer; add agave syrup, cinnamon stick and nutmeg and cook, stirring occasionally, for about 5 minutes or until cranberries have popped and apple is tender.

3. Remove from heat and stir in chopped walnuts. Let cool to room temperature. Remove cinnamon sticks.

Brie En Croute:

1 pkg frozen puff pastry, thawed and rolled out to 1/4 inch thick roundish shape
1 cup prepared Cranberry Apple Compote (more as needed)
1 medium wheel of french brie (or whatever size you need)

1. With a sharp knife, slice brie wheel in half horizontally (into two round slices, like a bagel).

2. Scoop half the Cranberry Apple Compote onto the bottom half of the brie wheel. Place the other half of the brie wheel on top and scoop more Cranberry mixture onto it.

3. Place pastry dough on a floured surface and roll to desired size and thickness.

4. Place the brie wheel in the centre of the rolled dough. Fold the dough up over the sides of the cheese, pleating the upper edges to fit snugly around the cheese. Pinch the dough together in the center to seal.

5. At this point, you can freeze your Brie En Croute for when you are ready to use it. Wrap the pastry tightly in plastic wrap and place in a zip lock bag. Freeze for up to two weeks.

6. To bake, lightly grease a cookie sheet and pre-heat the oven to 375 degrees F.

7. Make an egg wash (1 egg beated with a bit of water) and brush the dough evenly and thoroughly with the wash.

8. Bake for 40-50 minutes until pasty is lightly browned. Let rest for 5 minutes before serving.

9. Transfer brie to a platter and serve with crackers or sliced baguette. Serve the remaining compote in a small dish beside the platter. Be sure to include a sharp cheese knife!

Saturday, November 21, 2009

Prosciutto Wapped Roast Pork Tenderloin & Red Wine Gravy


I'm between night shifts tonight so I am in need of something quick. Believe it or not, roast pork tenderloin is almost as fast as boiling pasta. Almost. Contrary to some recipe instructions, a 1 pound piece of tenderloin does not need to cook for 45 minutes. It doesn't even need to cook for 30 minutes. After searing, this little gem only takes 10 minutes in a high oven for medium and 14 minutes for medium-well. Also contrary to what you may have been taught, pork can be a little pink. It's actually better when a little pink. Serve with some simple red wine gravy and you're good to go! If you want it to be even quicker and easier, leave out the prosciutto and just let the pork & simple seasonings shine!

Serves 2

1 lb pork tenderloin
3-4 pieces prosciutto
tsp olive oil
1/2 tsp each salt & pepper (omit salt if using prosciutto)
1/2 tsp garlic powder
1 tbsp vegetable seasoning blend

1. Pre-heat oven to 400 degrees F.

2. Mix seasonings together in a small bowl and rub onto tenderloin.

3. Wrap tenderloin in prosciutto (if using).

4. Place in a large, pre-heated skillet and quickly sear all sides (medium-high heat) so that prosciutto is browned and semi-crisp.

5. If your skillet is oven-safe, place directly into pre-heated oven, uncovered. If not, move tenderloin to a baking sheet or baking pan and place in oven.

6. Cook uncovered for 10-14 minutes (10 mins for medium, 14 mins for medium well).

7. Remove from oven and tent baking pan with foil. Let tenderloin rest for 10 minutes before cutting.


Simple & Quick Red Wine Gravy:

1/2 cup red wine
1 cup water or beef broth
1 package dry brown gravy mix or au jus mix
1 tsp corn starch mixed in 1/3 cup water (if using au jus mix)

1. Add everything to a sauce pan and bring to a boil.

2. Stir continuously until thickened.

Notes:

I served my pork with Red Wine Sauteed Spinach & Mushrooms, Roasted Brussels Sprouts, Asparagus and Broccoli and Red Roasted Potatoes. To drink? Whatever wine was used for cooking, or Pinot Noir pairs nicely with pork. A huge, delicious, satisfying meal.

Friday, November 20, 2009

Marianne Inspired Oatmeal


Last week I tried homemade oatmeal, inspired by Marianne at French Fries to Flax Seeds. One of her breakfast staples is a bowl of oatmeal mixed with whatever she can find in her cupboard. One day it's peanut butter, bananas and dried figs and the next it's blueberries, coconut butter and cocoa nibs. The other day she used Matcha green tea powder and made green oats! I'm not quite as adventurous as Marianne and I am a traditionalist when it comes to oatmeal, so my creation isn't quite as exciting as hers, but it was easily the best darn oatmeal I have ever eaten and has become a regular in my breakfast rotation.

1/2 cup oats (I use Bob's Red Mill Extra Thick Rolled Oats).
1 tsp Apple Pie Spice (see below)
1 tbsp chopped walnuts
1/2 cup milk
1/4 cup water (or any combination of milk/water to equal 3/4 cup liquid. Use only water for a vegan meal.)
1/4 cup applesauce or 1 small applesauce/fruit blend cup
1/2 cup assorted fresh or frozen berries/fruit (I've been using a mix of frozen mixed berries and fresh pomegranate seeds. Diced apple is nice too and I love it with blackberries! If using frozen berries, make sure they are thawed! Sometimes I add 1/4 cup dried cranberries as well.)

1. Mix the dry ingredients together in a microwave safe bowl.

2. Add the milk and water and stir together.

3. Microwave for 2-3 minutes, until most of liquid is absorbed. Stir well to mix.

4. Add applesauce and fruit and mix together.

*You could cook your oats on the stove top instead of the microwave. I haven't had the time or desire to do it that way yet.

Apple Pie Spice:
4 teaspoon ground cinnamon
2 teaspoon ground nutmeg
1 teaspoon ground allspice
1 teaspoon ground cardamom

1. Mix everything together in an airtight container and use as needed.

Thursday, November 19, 2009

Roasted Red Potatoes


It doesn't get any easier or tastier than this!

1/2 lb red potatoes
1 tbsp olive oil
course salt (Fleur de Sel is prefect)
fresh ground pepper
fresh chopped parsley or sliced green onion for garnish

1. Pre-heat oven to 400 degrees F.

2. Rinse potatoes and cut into quarters. You could also cut into wedges for mojo style potatoes.

3. Toss potatoes with olive oil.

4. Arrange on a baking sheet in a single layer.

5. Bake in oven for 15-20 minutes, turning about 1/2 way through cooking.

6. Remove from oven. Sprinkle with course salt and fresh ground pepper. Toss well.

7. Place in serving dish and top with chopped parsley or green onion.

Note: Use the same recipe for new baby potatoes, fingerling potatoes and sweet potatoes!

Wednesday, November 18, 2009

Red Wine Sautéed Mushrooms & Spinach


I merged my Red Wine Sautéed Mushrooms recipe with 10 Cent's Mushrooms Sautéed with Red Wine and Spinach recipe to come up with the perfect side dish for roasted pork tenderloin. Major delicious.

Roasted Brussels Sprouts, Broccoli & Asparagus


This was one of my Thanksgiving dinner side dishes. These veggies take very little time to cook. They are topped with toasted pine nuts and a balsalmic reduction. Everyone in my family enjoyed the dish. It's a keeper. From The Healthiest Meals on Earth.

Roasted Broccoli & Asparagus:

olive oil
1 lb Brussels spouts
1 bunch asparagus spears
1 large head broccoli
3 whole cloves garlic
salt & pepper
Garlic Balsamic Reduction (see below)
2 tbsp toasted pine nuts or chopped walnuts (optional)

1. Pre-heat oven to 375 degrees F.

2. Wash and trim the Brussels sprouts. Cut in half lengthwise. Toss the Brussels and garlic cloves in olive oil and arrange on a small baking sheet.

3. Place in oven. Set a timer for 10 minutes.

4. While Brussels are roasting, trim the asparagus. Trim and stem the broccoli and cut the broccoli into long thin pieces. Toss the veggies and arrange on a second small baking sheet.

5. After 10 minutes, place the second baking sheet in the oven along side the Brussels sprouts and roast for another 15 minutes, until vegetables are tender and lightly browned.

6. Remove from oven and place vegetables in serving dish. Make the Garlic Balsamic Reduction and pour over veggies. Add pine nuts. Season with salt and pepper.

Garlic Balsamic Reduction:

1/4 cup balsamic vinegar
3 whole roasted cloves garlic (from above)

1. While vegetables are roasting, add vinegar to a small sauce pan. Simmer over medium heat until vinegar starts to reduce and thicken.

2. When vegetables are cooked, remove roasted garlic pieces. Add reduced vinegar and roasted garlic cloves to a blender and puree.

3. Spoon garlic balsamic reduction over finished vegetables.


Tuesday, November 17, 2009

Italian Wedding Soup


When I made spaghetti and meatballs the other day, I reserved about 1/4 of the uncooked meatball mix and rolled then baked smaller meatballs to use towards soup. One of the easiest soups to make is Italian Wedding soup, especially if your meatballs are pre-made and ready to go. If you don't have meatballs left over, that's okay. Try the easy ones shown below. And contrary to some reports, the soup is not named Italian Wedding because it is served at Italian weddings. Rather the term "wedding soup" is a mistranslation of "miestra mariata", which means "married soup" in Italian and refers to how well all the ingredients in the soup blend (marry) together.

Meatballs:
1 lb ground beef or pork or a combination of both
1 egg
1/4 cup bread crumbs
1/2 small onion, minced
1 clove garlic, minced
salt & pepper to taste

1. Combine all ingredients in a bowl. Using your hands mix all together to spread ingredients evenly.

2. Using your hands, form into small balls (ping pong or gumball size).

3. Line a cookie sheet with parchment paper. Bake in 350 degree F. oven for 25 minutes or until meatballs are lightly browned.

Soup:
4 cups chicken broth
2 cups beef broth
1 cup fresh baby spinach, torn into smaller pieces
1/2 carrot, finely chopped
1/2 celery stalk, finely chopped
1/4 cup Orzo pasta or Macaroni, pre-cooked*
Prepared meatballs
salt & pepper to taste

*It is very important to cook your pasta PRIOR to adding to your soup. If you add uncooked pasta, it will absorb your broth and the pasta starch will thicken the soup. You want a very clear, thin broth.

1. Add chicken and beef broth to a large pot and bring to a boil.

2. Add carrot and celery. Reduce heat to medium.

3. Add pasta and meatballs. Add spinach. Reduce heat to medium-low.

4. Simmer for 10 minutes then serve immediately.

Note:You can omit the meatballs entirely to make a very delicious vegetable soup, or add cooked diced chicken or cooked ground beef and more diced veggies for a quick and easy chicken soup or hamburger soup.

Monday, November 16, 2009

Huevos Rancheros with Cooked Salsa


A weekday morning off work means a big breakfast. In my fridge I found three eggs, one flour tortilla, shredded Tex-Mex cheese and some left over homemade salsa. Perfect ingredients for a quick, simple Huevos Racheros.

Huevos Racheros means country-style eggs in Spanish and is a traditional breakfast dish in Mexico. Typically Huevos is made with lightly fried corn tortillas topped with fried eggs and cooked salsa. Some versions include a layer of refried beans or avocado. I add cheese to mine, just because. If you don't have time to make your own salsa, canned salsa works just as well!

Serves 2-4

Cooked Salsa:
splash olive oil
1/2 large white onion, diced
2 cloves garlic, minced
1 large can fire-roasted diced tomatoes
1 can diced green chilies (or two green chili peppers, seeded and diced)
1/2 green pepper and 1/2 red pepper, diced (optional)
pinch sucanat
1/4 tsp ground cumin
1/8 tsp chili powder
handful fresh cilantro, coarsely chopped (reserved)
salt & pepper to taste

1. Heat oil in a saute pan. Add onions and cook until translucent. Add garlic and stir.

2. Add tomatoes, chili pepper and bell pepper. Add all seasonings. Reduce heat to medium-low and let simmer for 10 mins, stirring occasionally.

3. Remove from heat. Stir in chopped cilantro. Season with salt and pepper to taste.

Huevos:

4 small flour or corn tortillas
4 eggs
splash of olive oil plus olive oil cooking spray
1 cup prepared salsa
1/2 cup shredded cheddar, jack or Tex Mex cheese blend
1 can refried beans (optional)
1 avocado, peeled, cored, sliced (optional)
fresh cilantro for garnish (optional)

1. Pre-heat oven to 350 degrees F.

2. Heat olive oil in non-stick saute pan. Add tortillas to pan and heat for a minute on each side. Arrange tortillas on serving plates.

3. Spray the same pan with olive oil cooking spray. Crack eggs into the pan (sunny side up style). Cook until desired yolk "done-ness" is reached (about 4 minutes for runny yolks). After two minutes of cooking, I covered my pan with a lid and cooked the eggs for another 4 minutes for semi-firm yolks.

4. If using refried beans, spread a thin layer of beans on each tortilla.

5. Remove eggs from pan and place one egg on each tortilla. Top with some cooked salsa and shredded cheese.

6. Slide plates into the oven and bake for a few minutes to melt cheese. Remove from oven and garnish with sliced avocado and chopped cilantro.

Sunday, November 15, 2009

Spaghetti and Meatballs


I watched an episode of David Rocco's Dolce Vita the other day where he made five different kinds of meatballs. The beef meatballs were made with ricotta cheese and sun dried tomatoes and braised in a smooth and silky tomato sauce. I decided it was a "must try" dish so on tonight's menu: simple spaghetti and meatballs a la David Rocco, served with Terra Breads Italian Cheese Bread.

Meatballs:

1lb extra lean ground beef
1/2 cup ricotta cheese
10 sun dried tomatoes, chopped
1 egg
1 cup parmigiana cheese, freshly grated
1 glove garlic, minced
handful fresh Italian parsley, chopped
salt & pepper to taste

1. In a bowl, add all ingredients and mix well. Use you hands to get all the ingredients blended and evenly distributed.

2. Shape meat into small balls, about the size of a golf ball, then pat down to form an oval. This will allow for even cooking.

3. Heat olive oil in a large sauce pan over medium heat. Add meatballs to pan and sear for about 30 seconds on each side. We're just looking for a quick sear to brown the meat, not to cook the meat.

4. Remove meatballs from pan and set aside until ready to use.

Tomato Sauce:

1/4 cup olive oil
1/2 onion, diced
2 cloves garlic, minced
3 cups tomato sauce
1 tsp Italian seasoning
salt & pepper to taste

1. Using the same pot that was used to cook the meatballs, add a bit more oil and heat. Add onions and cook until translucent. Add garlic and cook another minute. Add tomato sauce and Italian seasoning. Bring to a boil. Season with salt and pepper. Lower heat to medium.

2. Add partially cooked meatballs to the pot and cook uncovered for 30 minutes.

3. Serve sauce and meatballs over cooked spaghetti noodles. Top with more shredded parmigiana cheese and fresh chopped parsley.

Tip:

Save a small amount of the uncooked meatball mix for soup! I used about 3/4 of the mix to make meatballs for this recipe and with the reserved 1/4 mix, I rolled small meatballs (large gumball size) and baked them in a 350 degree oven for 20 minutes. When cooled, I placed in a seal-able container and refrigerated until I was ready to make my soup.

Saturday, November 14, 2009

Pomegranate Persimmon Apple Salad


It's persimmon and pomegranate season! What better way to make use of these two delicious fruits than to make a simple salad. I also threw in some sliced Grapple, but any old apple would do, or try pear instead of apple! The dressing recipe is courtesy of POM.

Pomegranate Persimmon Apple Salad:
Assorted mixed greens (I used 1 bag of mixed greens)
1/2 pomegranate, seeded (about 1 cup)
1 persimmon, quartered and sliced (peeled if you wish)
1 apple, diced
1/4 cup sliced, toasted almonds or pine nuts
1/4 cup blue, goat or feta cheese crumbles

1. Add salad greens, pomegranate seeds, persimmon and apple to a large serving bowl. Toss to mix. Sprinkle nuts and cheese on top. Serve with dressing.

POM Honey Dijon Dressing:
1 cup pomegranate juice
1/2 cup white vinegar
1 lemon, juice and zest
2 tablespoons honey
1 tablespoon Dijon mustard
1 cup grape seed oil
salt and pepper to taste

1. Add everything to a container with a tight fitting lid. Shake to mix well.

Friday, November 13, 2009

Mexcian Fiesta Rice


I was in need of a side dish for my baked crisp beef burritos so I came up with a fiesta in a bowl. Rice cooked with tomatoes and flavourful broth. Bright colours from veggies and a splash of lime juice for little kick. Ole!

2 cups long grain brown rice
1 cup beef braising broth (from Beef Taquitos OR 1 cup vegetable or regular beef broth
1/2 cup water
1 can diced tomatoes with juice
1 medium jalapeno, seeded and diced
1/2 small red onion, diced
3 garlic cloves, minced or pressed
1 tsp salt
1 handful fresh cilantro, chopped
juice of 1/2 a lime

1. Rinse rice in a fine mesh strainer under cool water. This will help remove some of the starch and make your finished rice more fluffy.

2. Add first 8 ingredients to a pot and bring to a boil. Cover and reduce heat to medium. Simmer 15 minutes or until all liquid is mostly absorbed (should be reduced by at least 1 cup). Pour rice into a shallow oven safe baking dish. Spread evenly. Cover with foil.

3. Bake in oven at 375 degrees F. for 25 minutes or until liquid is completely absorbed and rice is tender.

4. Remove from oven. Fluff again and fold in chopped cilantro and lime juice.


Thursday, November 12, 2009

Baked Crisp Beef Burritos


I had some ingredients left over from the Beef Taquito Bites so I whipped up (I use the term loosely) some crisp beef burritos. I used the left over beef broth to braise the beef in this recipe but it isn't necessary. You can easily create a new broth! The end result was very flavourful and filling.

Beef:
1 pk of stewing beef or stir fry beef strips
1 tbsp Mexican Seasoning (see below)
1 tbsp vegetable oil
1 carton (1L) beef broth
3 cloves garlic, minced (or combination of roasted & fresh, blended together)
1 can diced green chilies

1. Rub Mexican seasoning into beef pieces.

2. Heat oil in a saute pan (one with a lid) over high heat. When oil is hot, sear beef to brown slightly.

3. Reduce heat to medium. Add beef broth, diced green chilies and garlic. Add another tsp of Mexican seasoning. Bring to a boil.

4. Reduce heat to low (or Minimum heat setting) and cover pan. Let beef braise for 1-2 hours.

5. When beef is finished braising, remove beef and strain broth into another bowl. Toss the chili and garlic residue. Save broth for another use, if you wish. It will keep in the fridge for a couple days.

6. Using kitchen shears, cut beef into 1/4 inch pieces (or dice using a sharp knife). Beef is now ready!

Mexican Seasoning:

2 tbsp oregano
1 1/2 tbsp chili powder
1 tsp cumin
1 tsp garlic powder
1/2 tbsp onion powder
1/2 tsp salt
pinch ground cloves
pinch ground cinnamon

1. Mix all in a container with a tight fitting lid. Use as needed.

Filling:

1 pkg large flour tortillas
Prepared beef
1/2 small red onion, diced
1 stalks green onion, sliced
1 medium jalapeno, seeded and diced
1 can sliced olives, drained
1 handful fresh cilantro, chopped
1/2 cup shredded cheddar or jack cheese or tex mex cheese blend
cooking spray

1. Pre-heat oven to 400 degrees F. Spay cookie sheet with cooking spray.

2. Place beef in a bowl and layer with red and green onion, jalapeno, olives, cilantro and cheese. Mix well.

3. Microwave tortillas for 30-60 seconds until soft and pliable.

4. Scoop 3-4 spoonfuls of mixture into the centre of each tortilla. Fold in edges and roll to form a tight, closed burrito.

5. Place burritos on cookie sheet and spray tops with more cooking spray.

6. Bake in oven for 10 minutes per side.

7. Remove from oven and let cool 5 minutes, then cut each burrito in half on a bias.

8. Serve with garnish of your choice!

Garnish:

sour cream
more shredded cheese
sliced green onion
chopped cilantro
salsa
red pepper or jalapeno jelly
guacamole


Serve with Mexican Fiesta Rice!

Wednesday, November 11, 2009

Whole Wheat Banana Almond Pancakes


For some reason I woke up craving pancakes. I've never been a huge pancake fan. In the world of breakfast I will take bacon and eggs over pancakes everyday of the week and twice on Sunday. But today is Wednesday and I'd like some pancakes. These ones are made from whole wheat flour, wheat germ, flax meal and apple sauce.I would have added blueberries but I didn't have any on hand. Regardless, there's all sorts of good stuff going on in the mix!

1 cup whole wheat flour
1/4 cup wheat germ
1 tbsp flax seed meal (ground flax seed)
1 1/2 tsp aluminum-free baking powder
1 tbsp sucanat
1/2 tsp cinnamon
1/4 tsp nutmeg
pinch of salt
1/3 cup unsweetened apple sauce
1 1/4 cup milk
1/2 tsp vanilla
2 banana, peeled and diced
1/4 cup sliced raw almonds

1. Mix dry ingredients (first 8) together. Add apple sauce, vanilla and milk. If batter is too thick, add more milk, a tablespoon at a time until desired consistency reached. Fold in almond and banana.

2. Heat large frying pan over medium-low heat. Spray with olive oil cooking spray. When pan is heated, pour badder into pan, forming small circles of about 1/3 cup each. Pancakes are ready to flip when small bubbles form on the top. Usually takes 2-3 minutes on first side then just a minute or two on the second side.

3. Serve with REAL maple syrup, butter and more diced banana.

Tuesday, November 10, 2009

Crab and Corn Salad on Corn Chips

Another delicious appetizer dish for which I have no accompanying photo. This was an even more popular dish than the Beef Taquito Bites, especially the next day when I took the left overs to work. It's such a fresh tasting treat and would be excellent on a hot summer day paired with a crisp, cool white.

6 6-1/2 inch corn tortillas
olive oil spray
1 brick cream cheese, softened at room temp (250g)
3 tbsp mayonnaise
1 bunch green onions, sliced thin, half reserved
1 small shallot, diced fine
1 stalk celery, diced small
1 cup fresh REAL crab meat(or canned crab meat) REAL, not imitation
2 cans whole corn kernels
1 tbsp lemon juice
1 clove garlic, minced
1 tsp cumin
1/2 tsp coriander
1/2 tsp salt
1/8 tsp pepper
Optional: diced red chili pepper, diced red or yellow bell pepper

If you have Crab Dip Mix (Epicure and Gourmet du Village make really good ones) use that instead of the seasonings (everything below lemon juice).

1. Pre-heat oven to 400 degrees F. Stack tortillas and trim the edges to form squares. Cut the stack into four equal pieces, making squares. Cut each square in half diagonally to form triangles.

2. Spray a large cookie sheet with olive oil spray. Arrange the tortillas on the cookie sheet. Season with a sprinkle of course salt (I used a special garlic chili salt. Delicious!). Bake in oven until golden brown, about 10 minutes. Do not let them over bake. Set aside to cool.

3. Mix together cream cheese, mayonnaise, lemon juice and seasonings. Stir in the celery, shallot, green onion, corn and crab meat. Adjust seasonings as needed. Refrigerate until ready to use.

4. To assemble, top each chip with 1 tbsp of corn and crab salad. Sprinkle some green onions on top for garnish.

Variation:

- Instead of topping the chips with the salad, use it as a dip. Put the salad in a heat proof bowl. Add some shredded jack cheese and bake in the oven for 15-20 minutes.

- Make a crab salad sandwich! Spread it on crusty bread or stuff it in a pita. Perfect for a picnic!

Saturday, November 7, 2009

Braised and Shredded Beef Taquito Bites

Last night I helped make some appies for my aunt's 50th birthday surprise party. These Taquito bites were very popular. This is a multi-part recipe but the end result is so, so good! Unfortunately the end result was SO good, that I wasn't able to get a picture. I do plan to make these again one day though so I will be sure to post a picture eventually.

**Finally got some pictures of the taquitos. I made them again for my cousin's baby shower and they were even more popular!**


Braised and Shredded Beef Taquito Bites

Part 1: PREPARE THE BEEF

2lb beef round roast
2-3 tbsp Mexican Seasoning (see below)
1 tbsp cooking oil
2 small cans diced green chilies, 1 reserved until end
1/2 head of roasted garlic (4-5 cloves)
2 cloves fresh garlic, pressed
1 carton beef broth

1. Generously rub the roast using the Mexican Seasoning. Ensure to coat all sides and rub it in using your fingers.

2. In a hot, oiled pan, sear the roast on all sides.

3. While beef is searing, in a small bowl, mix roasted garlic with fresh garlic and mash with a fork to form a puree.

4. Using tongs, place beef in a slow cooker. Cover with diced green chilies and garlic puree. Pour beef broth into pot to mostly cover the beef.

5. Set slow cooker to high heat and set the timer for 4 hours.

6. When beef is cooked, remove from slow cooker and place into a bowl. Using two forks, shred the beef into small pieces.

7. Strain broth into a bowl. Discard left over chili and garlic pieces. Add 1/4 cup of strained broth back to the beef. Mix together well. Beef should be moist but not dripping.

8. Add the second can of chopped green chilies and mix well. Add more broth if required.

Note: Save your broth for next time you make Tortilla Soup, add a bit to mashed potatoes, use it to cook Mexican rice or mix a 1/2 cup with 1 tsp Mexican seasoning and add to ground beef for delicious Tacos!

Mexican Seasoning:

2 tbsp oregano
1 1/2 tbsp chili powder
1 tsp cumin
1 tsp garlic powder
1/2 tbsp onion powder
1/2 tsp salt
pinch ground cloves
pinch ground cinnamon

1. Mix all in a container with a tight fitting lid. Use as needed.

PART 2: ASSEMBLE THE TAQUITOS

1 pk large flour tortillas
Prepared shredded beef

1. Pre-heat oven to 375 degrees F. Lightly grease a cookie sheet, or use parchment paper.

2. Heat tortillas in microwave for 30 seconds so they are more pliable.

3. Place a couple tablespoons of beef off centre on each tortilla. Ensure to fill right from end to end.

4. Gently roll the tortilla into a tight tube shape. If required, you can secure rolls with a toothpick.

5. Place rolls on cookie sheet and spray with cooking spray.

6. Bake in pre-heated oven for about 20 minutes until tortillas are crisp and lightly browned. Half way through cooking, turn taquitos. Keep an eye on them to be sure not to over cook.

7. Let cool slightly then remove toothpicks and cut each tortilla in half, then each half in half again (each roll will provide 4 "bites").

8. Serve with sour cream, guacamole and salsa. I served mine with sour cream mixed with a couple teaspoons of taco seasoning. Very good.

Notes:

- Beef can be prepared up to a day in advance. Any more than that and it will lose moisture.
- Taquitos can also be prepared a day in advance. The tortillas may get a little soft or "moist" on the bottom, but that will be fixed when baked. Start baking with the moist side turned up.
- Instead of cutting into "bites", keep them in halves or whole for a snack or dinner entree.
- Add shredded jack cheese to your Taquitos. Place it in the middle on top of the meat mixture about 1/2 inch down from the edges to ensure no cheese leakage while baking.

Thursday, November 5, 2009

Roasted Garlic


Please excuse the horrible picture. My DSLR was charging so I was left with the ol' point and shoot. I will try to make up for it next time I roast garlic - which I am certain to do. When garlic is roasted, the flavour becomes more mild and the texture is creamy and rich. It is great rubbed on croustini and even better in mashed potatoes. And surprisingly, it's very easy to make!

2 heads of garlic
drizzle olive oil
salt and fresh ground pepper, to taste

1. Preheat oven to 400 degrees F.

2. Peel outer layers from garlic, leaving the skins of the bulbs intact.

3. Cut the top off each head (about 1/4 inch down), exposing the cloves.

4. Place the heads in a garlic baker, brie baker or wrap them in foil.

5. Drizzle with olive oil and sprinkle with salt and pepper.

6. Place in hot oven and bake for 30-35 minutes. Cloves should feel soft when pressed.

7. Let garlic cool before handling. Use a knife to to cut the skin around each clove. Squeeze out the roasted garlic or use a fork to pull out the whole clove.

Now...

- Eat it as is
- Spread it on toast for fresh roasted garlic toast
- Mix with mashed potatoes
- Add to pasta sauce
- Eat on a cracker (makes a great, fun appie!)
- Use it in salsa (with roasted tomatoes)
- Make your own roasted garlic Caesar dressing

Roasted garlic can be stored in the fridge for several days.

Coming sometime soon... A Shredded Beef Taquito recipe. The beef is braised in a broth of roasted garlic puree and diced green chilies. It's killer.

Wednesday, November 4, 2009

Organic - To Buy or Not to Buy


The "organic dilemma" conversation has came up with a co-worker a couple times in the last few weeks. She heard or was told to alwyays buy this organic or buy that organic and she wasn't sure if it was absolutely necessary. Organic food is more expensive, there is no question. The price difference can range from 5%-50%, depending on what you're buying and where you're shopping. There is also the argument that organic food is no better for you than regular food.

A study published in the American Journal Of Clinical Nutrition in July 2009 found "a small number of differences in nutrient content [...] between organically and conventionally produced foodstuffs, but these are unlikely to be of any public health relevance".

The study does not address the issue of pesticides. I don't know about you, but I don't buy organic vegetables thinking my organic carrot has more vitamin A than a conventionally grown carrot. I buy the organic carrot thinking it contains no pesticide or other chemical residue. Is the organic carrot healthier for me? No, probably not. Do I feel better about eating it? Absolutely.

The U.S. Dept of Agriculture periodically monitors and tests produce from around the world for chemical residue. The foods then get a rating on a scale of 100. A low rating means less chemical reside and a high rating means more residue. They also found that even after washing, some fruits and vegetables carry much higher levels of pesticide residue than others.

Based on the analysis of over 100,000 residue tests, the USDA came up with the "dirty dozen" - the top 12 produce items that should always be bought organic due to high levels of chemical residue found on the conventional product.(MSNBC.)

The Dirty Dozen:

* Apples (in 2005 Apples rated 89 out of 100!)
* Cherries
* Imported Grapes
* Nectarines
* Peaches
* Pears
* Raspberries
* Strawberries
* Bell peppers
* Celery
* Potatoes
* Spinach

On the flip side, the USDA also published the top 12 produce items that tested the lowest for chemical residue. They say it is not necessary to buy these items in organic form.

The "Clean" Dozen:

* Bananas
* Kiwi
* Mangos
* Papaya
* Pineapples
* Asparagus
* Avocado
* Broccoli
* Cauliflower
* Corn
* Onions
* Peas

If you look at the two lists, a common theme comes up that can help you remember when to buy organic. This isn't always the case, but it is a good rule of thumb. If you are going to eat the skin, buy organic. If you are going to peel it, buy conventional.

If you enjoy scientific data, read the USDA Pesticide Data Program Report, 2006.

Tuesday, November 3, 2009

Pasta e Patate


Another day, another pasta dish. You can't beat the ease of preparation when it comes to Italian cooking (usually). Tonight's recipe comes from David Rocco's Dolce Vita on Food Network Canada.

"Pasta e Patate" is a traditional recipe from Naples. It's a very rustic dish that can be served as a soup or pasta dish (by simmering and reducing the broth). It's a very interesting dish. Pasta and potatoes? How odd. But the starch from the pasta and the starch from the potatoes come together to make such a rich, creamy sauce... it's almost like a risotto of the pasta world. It would probably be delicious with some chorizo and diced plum tomatoes. A sprinkle of fresh chopped parsley wouldn't hurt either. You could skip the prosciutto for a vegetarian dish but... I wouldn't. :)

1/4 cup extra virgin olive oil, plus extra for drizzling
4-5 slices prosciutto or pancetta, chopped
1 white onion, chopped
1 stalk celery, roughly chopped
1 carrot, roughly chopped
1 fresh chili pepper, chopped
salt and freshly ground black pepper, to taste
2 baking potatoes, peeled and cubed
2 1/2 cups water
1 1/2 cups tomato sauce
1 1/2 cups small pasta or broken spaghetti
1 tsp Italian seasoning
1/2 cup pecorino romano cheese, chopped fine
1/2 cup parmigiano cheese, freshly grated

1. Heat EVOO in a large sauce pan. Add proscitto and cook until crisp.

2. Add onion, celery, carrot, chili pepper, salt and pepper. Saute until onions are soft.

3. Add potatoes. Let saute for 2-3 minutes, stirring often to prevent the potatoes from sticking.

4. Add water, tomato sauce and Italian seasoning. Stir then add pasta. Mix together well. Let simmer for 5 minutes. Add a little more water, 1/2 cup at a time, as the pasta and potatoes absorb the liquids.

5. Add pecorino cheese. Cook for a few more minutes until cheese has softened and sauce is thickened and creamy. If you would prefer a soup, add more water.

6. Spoon into serving bowls. Drizzle with good quality olive oil and sprinkle with fresh grated parmigiano cheese. Let cool before serving. (David Rocco says it is best at room temperature. I find it too good to let it sit long enough to find out if he's right!)

I served this with a side salad, fresh garlic rubbed toast and a glass of milk, although a dry red would be nice too.

Monday, November 2, 2009

Quick Pasta Dinner


It's my first day off and I'm coming off a night shift. I have no groceries and no desire to cook. This is always my dinner dilemma day. I considered take out, ice cream and skipping dinner altogether but none of those options were very appetizing. Enter the Quick Pasta Dinner. Made from ingredients most everyone would have on hand, even when the fridge is bare. It takes less than 20 minutes to prepare and could be made in one pot, instead of the two that I use. Pair with a crisp, cold white and you're in fast food heaven - REAL fast food, that is!

Olive Oil, Garlic & Parmesan Pasta:

Serves 2

Pasta of your choice (spaghetti, linguine, penne etc.)
4 cloves garlic, minced
1 tsp crushed chilies
1/4 cup Extra-Virgin Olive Oil
1/4 cup Parmesan, grated (or more if you like it cheesy!)
1/4 cup pine nuts
large handful fresh parsley, chopped (freeze dried or dried works too)
Freshly Ground Black Pepper and salt to taste.

1. Cook pasta per package directions and drain.

2. While pasta is cooking, mince garlic and chop parsley. Toast pine nuts for a minute or two in a dry saute pan over medium low heat, just until the nuts start to brown. Remove nuts from pan and set aside.

3. Heat oil in saute pan over medium-low heat. Add garlic and crushed chilies. Saute for 2 minutes.

4. Add drained pasta to the saute pan and stir together with garlic and chilies. Add pine nuts. Saute for another couple minutes.

5. Remove pan from heat. Add Parmesan, parsley, salt and pepper. If needed, add generous a drizzle of olive oil.

6. Stir together. Spoon into bowls and top with another sprinkle of fresh parsley and more crushed chilies.

Saturday, October 31, 2009

Red Wine Sauteed Mushrooms


About two months ago I was addicted to mushrooms. I ate mushrooms with every meal for about 8 days in a row. Wine sauteed mushrooms turned out to be my favourite dish and is now a "must have" when serving steak. This batch was served alongside a medium rare NY strip loin, roasted sweet potato and steamed green beans and carrots.

1 lb white button mushrooms
3 tbsp unsalted butter (or more if you think it's needed)
pinch salt
splash of olive oil (to keep butter from burning)
1/3 cup dry red wine
1 tbsp lemon juice
salt & pepper to taste
handful fresh parsley, chopped

It's sinful, but these mushrooms taste best when cooked with LOTS of butter - the more butter, the better. I used a tad bit more than the 3 tbsp called for in the recipe.


1. Brush mushrooms to remove any visible dirt. Cut mushrooms in half, or into quarters if they are very large.

2. Heat butter and olive oil in a saute pan over medium heat.

3. Add mushrooms and salt and saute until reduced, browned and tender.

4. Add red wine and continue to stir until wine reduces, about 8 minutes. (I reduced mine to low and let simmer for 15 minutes while I prepared other dishes).

5. Add lemon juice, parsley and salt and pepper to taste.

Variation:

Try adding fresh baby spinach to your saute. Use two large handfuls of spinach (1/2 small bag) and add it near the end of cooking and stir until it wilts. Omit the lemon juice and parsley. Season with salt and pepper and serve immediately. Courtesy 10 Cent Diet.

Friday, October 30, 2009

Immunity Boosting Foods


Veggies @ Granville Island Market

The flu season has hit us early and with a vengeance. Everyday the media is reporting on a new death from H1N1; Seemingly healthy people are dropping like flies. After much thought and debate I have decided not to get the H1N1 vaccine. The reasons are my own and are not up for debate here. Instead of medical prevention, I will be seeking holistic prevention. I will be:

-obsessive about hygiene and sanitation. Hand sanitizer and wet wipes go with me everywhere!
-keeping my schedule mostly free so I have more time for rest and relaxation.
-going to bed at a decent hour every night that I am not working.
-eating as healthy and wholesome a diet as I possibly can.
-looking into vitamins and supplements and remembering to use my bee pollen (my co-workers swear by oil of oregano)
-getting some physical activity every day (not strenuous)

10 Cent posted about her Anti Flu Diet the other day which got me doing some research on foods that give our immunities a little boost. One of the books on my Required Reading list also touches on eating for immunity.

I learned quite a bit. Read the page in the link for more detailed information. The top five immunity boosting winter foods are:

- Cruciferous vegetables (brussels sprouts, broccoli, cauliflower, kale etc.)
- Orange vegetables (carrots, yams, sweet potato, winter squash, pumpkin etc).
- Mushrooms
- Whole Grains (whole wheat, oats, quinoa, amaranth, brown rice, etc.)
- Alliums (onions, shallots, leeks, scallions, garlic, chives)

Other sources add in:

- Omega 3's (wild salmon, fish oil)
- Grass-fed beef (high in zinc and vitamin D)
- Yogurt
- Oysters & other shellfish (high in Zinc and selenium)

Vegetables should be "raw, lightly steamed or gently stir-fried" to preserve their nutrients.

Dr. Moashing Ni (the author of Secrets Of Longevity) recently wrote another article about natural immunity boosters and ways to prevent colds and flus. You can read it here,

On the menu tonight:

- Poached salmon
- Baked sweet potato
- sautéed mushrooms in red wine
- steamed broccoli and green beans

Thursday, October 29, 2009

Beef & Bean Enchiladas


Tonight's recipe falls into the category of things that taste good but photograph poorly (as Marianne says). The inspiration comes from my need to clean out my pantry, fridge and freezer. My cupboards are overflowing and it's time I use up what I have before I go on another grocery shopping trip. I will be honest and tell you I am using ground pork in my enchiladas because I don't have ground beef but it works just the same. The seasoning comes from the same Mexican Seasoning I posted in my Spicy Black Bean Tortilla Soup recipe.

Beef & Bean Enchiladas:

1/2 red onion, diced
1/2 can diced green chilis
1 lb lean ground beef, pork, chicken or turkey
1 tbsp Mexican Seas1oning, or more to tastes (see below)
1 can refried beans
1 small can sliced black olives
1 pkg small corn tortillas
2-3 cups prepared Enchilada Sauce (see below)
cheddar cheese, shredded
sour cream, for garnish
diced green onion & fresh cilantro for garnish

1. Pre-heat oven to 350 degrees F and lightly grease a large glass baking dish.

2. Heat oil in a sautee pan over medium heat. Add onion and chilies and saute for a few minutes until onions are translucent.

3. Mix Mexican Seasoning with a 1/4 cup of water.

4. Add ground meat to pan and break apart with spatula. Pour seasoning over top. Mix well and cook until meat is browned. Drain fat, if necessary.

5. Remove mixture from pan and place in a medium mixing bowl. Once cooled slightly, add refried beans and sliced olives and mix well.

6. Wrap a damp paper towel around tortillas and microwave for 1 minute until pliable.

7. Pour some enchilada sauce in the bottom of the glass baking pan and spread to coat.

8. Fill each tortilla with 2-3 large spoonfuls of meat and bean mixture. Roll into burritos and place seam side down into the baking pan. Continue doing this until the pan is filled. A large pan should fit 8-10 enchilada rolls.

9. Pour the rest of the enchilada sauce over top of the enchilada rolls, ensuring to coat the rolls well.

10. Sprinkle the top with shredded cheddar cheese and more diced green chilies and sliced olives, if desired.

11. Cover with foil and bake for 25 minutes then remove foil and bake uncovered for an additional 5 minutes.

12. Spoon enchiladas onto plates and top with sour cream, green onions and cilantro.

Enchilada Sauce:

3 tbsp chili powder
3 tbsp corn starch
1 tsp cocoa powder
1/2 tsp garlic salt
1 tsp oregano
3 cups water
1 cup tomato sauce (8oz can)

1. Combine all dry ingredients in a bowl.

2. Stirring constantly, slowly add enough water to make a thin paste. Pour into sauce pan and add the rest of the water.

3. Cook over medium heat, stirring constantly until the mixture thickens.

4. Stir in tomato sauce. It is now ready to use!

5. If you want the sauce less spicy, use less chili sauce and more tomato sauce.

Mexican Seasoning:

2 tbsp oregano
1 1/2 tbsp chili powder
1 tsp cumin
1 tsp garlic powder
1/2 tbsp onion powder
1/2 tsp salt
pinch ground cloves
pinch ground cinnamon

1. Mix all in a container with a tight fitting lid. Use as needed.

Wednesday, October 28, 2009

Potato Lentil Vegetable Soup


This recipe was inspired by Epicure's Potato Lentil Soup. I've never cooked with lentils before, so this was a first for me. I also learned that lentils don't cause gas like their cousin beans do. Bonus!

Potato Lentil Vegetable Soup:

Olive Oil
1/2 red onion, diced
2 cups diced red potatoes
3 stalks celery, diced
2 large carrots, diced
2 cloves garlic, minced
2 cups red lentils (pre soaked per package directions)
2 tsp dried thyme
1 tsp dried oregano
1/2 tsp ground cumin
1/8 tsp cayenne pepper
salt & pepper to taste
8 cups vegetable stock

1. Heat oil in a large soup pot over medium heat. Cook onions, celery, carrots, garlic and potatoes for a few minutes until fragrant.

2. Add stock, lentils and seasonings. Bring to a boil.

3. Reduce heat to low and simmer for 30-40 minutes until potatoes are cooked and broth has reduced slightly.

4. Season with salt and pepper to taste. Garnish with fresh chopped herbs.

Tuesday, October 27, 2009

Star Fruit


This Asian fruit is sweet enough to satisfy a dessert craving AND high enough in fiber to serve as a between meal snack.

Star Fruit comes from the Carambola tree and is native to South Asia. One fruit only has 30-40 calories, is high in fiber and rich in vitamin C and anti oxidants. I think of it as a cross between a citrus fruit and an apple. It's delicious in an odd way.

It should be noted that their are health risks associated with Star Fruit, specifically for those with kidney disease. There is also a risk of drug complications for those taking certain medications (similar complications as grapefruit). If you are unsure, check with a doctor before snacking on delicious star fruit!

Read here on how to prepare and eat a Star Fruit.

Monday, October 26, 2009

10 Cent's Spicy Vegetarian Escabeche


This is one of my all time favourite 10 Cent Diet recipes. I didn't deviate from her recipe very much so you might as well just check it out on her blog. The only change I made was to reduce the amount of chilies used. Her recipe calls for six. I used three the first time I made it and it was still too hot for me. This time I used two. If you aren't much for heat, start with half of one and go from there. I have made this a few times, once adding baby potatoes and another time using the broth to poach a piece of wild salmon. It's a very versatile recipe. Tonight I served it over rice.

10 Cent's Spicy Vegetarian Escabeche.

And in case you're wondering: Escabeche is a typical Mediterranean cuisine which refers to both a dish of poached or fried fish that is marinated in an acidic mixture before serving. The marinade itself is also referred to as an escabeche. The dish is common in Spanish cuisine. (From Wikipedia)

Friday, October 23, 2009

Quick Mushroom & Herb Omlette


There isn't a recipe to go along with the post. Everyone knows how to make an omlette. I'm just making a point that a delicious, satisfying omlette is just as quick and easy to prepare as a couple slices of toast slathered in PB or a dish of yogurt covered in fruit.

For this particular omlette, I sauteed mushrooms and onions with olive oil in a small fry pan (or omlette pan). My preparation was easy because I bought my mushrooms pre-sliced and I had half an onion left over that just needed a quick dice. When the vegetables were cooked, I poured a lightly beaten egg over top. I sprinkled it with salt and pepper. I left it to cook gently over medium-low heat. Once most of the liquid was gone and the egg mixture had fluffed up, I folded the sides over to create my "folded side" omlette. You could also add some cheese before folding. The liquid doesn't need to be completely gone because once you fold it, the heat will continue to cook the egg. Sprinkle with an herb of your choice and serve with whatever you would like. Today I used some shaved black forest ham.

In total this preparation took 10 minutes, most of it unattended. While my omlette was cooking I was able to unload and re-load my dishwasher and take some clothes out of the dryer. Yesterday I prepared a similar omlette while I was getting ready for work. I plated it into a glass "to go" container and ate it once I got to the office.

Quick, easy, filling and delicious!

Thursday, October 22, 2009

Grilled Chicken with Roasted Beet & Sweet Potato Pies


There is no recipe for this dish.

Last night I had a Roasted Beet & Sweet Potato Salad for dinner. This time, I topped it with a bit of grilled chicken (quickly marinated in lemon juice, olive oil and Epicure Herb & Garlic Dip Mix). I made some extra veggies and chicken so I would have lunch for today.

This morning while looking through the fridge, I found left over puffy pastry from when I made Turkey Pies.

Et voila!

Roll out your puff pastry into a rectangle. Place beets, sweet potatoes and shredded chicken on half. Add some feta if you have it. Drizzle with balsamic vinaigrette and lightly sprinkle with salt and pepper. Fold over, pinch closed to seal, cut a few slits in the top, brush with egg wash, and bake in oven at 375 degrees for about 20 minutes. Everything inside is already cooked so it was just the pastry that needed a quick bake & brown.

These pies (as well as the Turkey Pies) freeze well too so they make a quick and easy re-heatable dinner.

Wednesday, October 21, 2009

Spicy Black Bean Tortilla Soup


Along with loving all things Thai, I also love all things Mexican. This recipe was inspired by Epicure. If you have some Epicure spices, check out the original recipe here. I really enjoyed this soup and I will definitely make it again.

Spicy Black Bean Tortilla Soup:
1/2 white onion, diced
1 cup zucchini, diced
1 28oz can diced tomatoes
1 28oz can black beans, drained & rinsed
4 cups vegetable broth
2 tbsp Mexican seasoning (see below)
1 cup prepared hot salsa
1 can diced green chilies (reserved)

1. Add all ingredients (except the diced green chilies) to a soup pot and bring to a boil over medium heat.

2. Reduce heat to low and simmer for 30-40 minutes.

3. Remove pot from heat and puree soup using an immersion blender.

4. Add diced green chilies and stir well to incorporate.

5. Ladle into bowls and top with Crisp Corn Tortilla Strips and desired garnish.

Crisp Corn Tortilla Strips:
3-4 corn tortillas, sliced into thin strips
2 tbsp olive oil

1. Heat oil in fry pan over medium high heat.

2. Add strips to oil one handful at a time.

3. "Deep fry" strips for 1-2 minutes until crisp and starting to brown.

4. Remove from pan and place on paper towel.

Optional Garnish:
fresh cilantro leaves
shredded cheddar or jack cheese
sour cream
sliced avocado

Mexican Seasoning:
2 tbsp oregano
1 1/2 tbsp chili powder
1 tsp cumin
1 tsp garlic powder
1/2 tbsp onion powder
1/2 tsp salt
pinch ground cloves
pinch ground cinnamon

1. Mix all in a container with a tight fitting lid. Use as needed.

Tuesday, October 20, 2009

Chinese Chicken and Snow Peas over Ginger Rice


This is another recipe inspired by my dad. He will often make this using shrimp instead of chicken or with bell peppers instead of snow peas. I can't eat bell peppers and I don't have shrimp so this will have to do!

Serves 3-4

Chinese Chicken and Snow Peas

Chicken Prep:
2 boneless, skinless chicken breasts
2 tsp baking soda

Sauce:
2 tbsp gluten free oyster sauce
2 tsp gluten free soy sauce
2 tsp minced ginger
1 tsp minced garlic
1/4 tsp ground white pepper
1/3 cup fresh chicken broth
1 tsp sucanat
1 tbsp rice wine vinegar
1/4 tsp sesame oil
1 tsp corn starch

Stir Fry:
1/4 cup cashews
1 1/2 cup snow peas, washed and trimmed
1/2 small onion, diced medium
1/2 can sliced water chestnuts

1. Place chicken in a shallow bowl and coat well with baking soda. Let rest for 15 minutes.

2. While chicken is resting, combine sauce ingredients in a small bowl. Mix well and set aside.

3. Rinse chicken well and pat dry. Cut into small cubes. Place chicken in a bowl and coat with 1/4 of the sauce mixture. Marinate for at least 30 minutes.

4. While chicken is marinating, blanch snow peas. Heat 1-2 cups water in wok over medium high heat. Fill a bowl with water and ice and set aside. When wok water is boiling, toss snow peas in and leave for 30-60 seconds. Remove immediately with a slotted spoon and place them in the bowl of ice water to stop the cooking process. Remove from ice bath and set snow peas aside until ready to use.

5. After 30 minutes of marinating the chicken, heat a small amount of peanut or sesame oil in a wok over medium high heat.

6. Add marinated chicken and stir fry until meat is nearly cooked. Remove from wok and set aside.

7. Add onion to wok and stir fry for 2-3 minutes until onions are slightly translucent. Reduce heat to medium.

8. Add chicken back to the wok along with the snow peas, cashews and water chestnuts. Stir together.

9. Pour remainder of sauce over stir fry and mix well to coat. Stir and simmer until sauce is thickened, chicken is cooked through and vegetables are tender crisp.

10. Serve over Ginger Rice.

If you are in a time crunch, skip the baking soda step. The baking soda helps make the chicken tender by breaking down the tissues, sort of like brining. It isn't absolutely necessary though.

Related Posts with Thumbnails