Thursday, September 30, 2010

Pumpkin Muffins


This recipe was forwarded to me by my cousin, Tobe. I re-worked the ingredients to eliminate refined vegetable oil, white sugar and all-purpose flour and reduced the amount of oil and sweetener. The end result is quite good. The spices and pumpkin really stand out. A warm pumpkin muffin with a pat of butter is lovely with tea on a rainy fall afternoon! You could also make pumpkin loaves, if you prefer.

1 400ml (14oz) can 100% pumpkin puree (NOT pumpkin pie filling)
4 whole eggs
1/2 cup unrefined coconut oil, melted
2/3 cup water
1 cup unrefined golden cane sugar
1 tsp vanilla extract
3 1/2 cups whole wheat pastry flour
2 tsp aluminum free baking soda
1 1/2 tsp salt
2 1/2 tsp Pumpkin Pie Spice (see below)

1. Preheat oven to 350 degrees F. Lightly grease and flour two 12-cup muffin tins.

2. In a large bowl, whisk together pumpkin puree, eggs, coconut oil, water, cane sugar and vanilla until well blended. In a separate bowl, whisk together the flour, baking soda, salt, apple pie spice and ginger. Stir the dry ingredients into the pumpkin mixture until just blended. Pour into the prepared pans.

3. Bake for about 50 minutes in the preheated oven or until a toothpick inserted in the centre of the muffins/loafs comes out clean.

4. Let cool slightly in pan, then remove to finish cooling on a wire rack.

Homemade Pumpkin Pie Spice Mix:

(4:1 ratio of cinnamon to other spices. Adjust volume accordingly.)

1/4 cup ground cinnamon
1 tablespoon ground ginger
1 tablespoon ground nutmeg
1 tablespoon ground cloves

1. Add everything to a small glass jar and seal with a tight fitting lid. Shake well to mix. Store for up to 6 months.


Wednesday, September 29, 2010

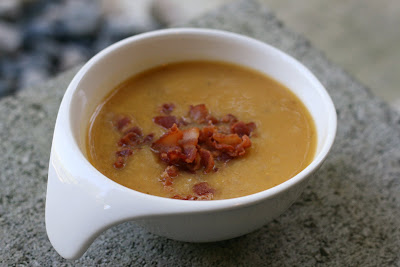
Butternut Squash Apple Bacon Soup


The perfect soup for a chilly fall day!

1 1/2 lb butternut squash, halved and seeded
2 onions, quartered
2 cloves garlic
2 medium apples, quartered
4 tsp olive oil
2 cups vegetable broth
1 tsp dried sage
1 tsp honey
4 sliced bacon, diced
salt and pepper

1. Peel and cut squash into large,1 1/2 inch cubes. Place cubes into a roasting pan. Add onion, and garlic. Drizzle with olive oil and a pinch of salt. Toss to coat. Roast for 425 degrees for 30 minutes until squash is tender. Half way through roasting, add apples to pan, toss everything together and place back in the oven to finish roasting.

2. Peel roasted apples (skins should slip off easily). Add apple, squash, onion and garlic to a food processor.

3. Heat roasting pan over medium-high heat. Add 1 cup vegetable broth, and bring to a boil, scraping up browned bits from the roasted vegetables. Add broth to food processor with the vegetables. Blend everything together until smooth. Add honey and sage and pulse to blend together.

4. Cook bacon in a dutch oven or heavy saucepan, over medium-high heat until crisp. Transfer cooked bacon to a paper towel lined plate. Remove all but 1 tablespoon of bacon fat from dutch oven. Add vegetable puree, the rest of the vegetable broth, 1 cup water, and a pinch each of salt and pepper. Bring to boil then simmer for 5 minutes.

5. Serve sprinkled with crisp cooked bacon and a dollop of sour cream.

This post is part of Twister Tuesday at GNOWFLINS and Real Food Wednesday at Kelly The Kitchen Kop.


This post was featured on the front page of Tasty Kitchen on October 6, 2010.

Monday, September 27, 2010

Okanagan Farm Stands


Highway scenery last summer. The weather wasn't as gorgeous this weekend!

I spent the weekend in the Okanagan region of British Columbia. The area is well known for fruit and produce. (The region is also well known for it's wineries, that that wasn't the purpose of this trip). Road side fruit stands line the highways through every little town and big city, from Salmon Arm in the North Shushwap area, down through Enderby, Vernon and Kelowna on Highway 97A, and all along Highway 3 (Hope-Princeton/Crowsnest) through Peachland, Summerland, Penticton, Keremeos and Princeton. Highway 3 is the fruit stand highway. If you come to the Okanagan looking for fruit, make sure you take the Hope-Princeton Highway instead of the Coquihalla (Hwy 1). The route is a little longer and a little bit windier, but it's worth it just for all the fruit stands. Come in the summer for berries (especially cherries), peaches, nectarines and plums and come in the fall for apples, pears, pumpkins and squash.


Photo Credit

We stopped at Bear's in Keremeos. It's apple and squash season in the Okanagan. There were a dozen varieties of winter squash, some I'd never seen before. Along with the usuals (butternut, turban, delicata, acorn), they also had some odd looking grey things and some white acorns.


Grey Hubbard Squash

I stocked up on three varieties of local apples but all I can remember is honey crisp - I already forgot the other two varieties! I also picked up a couple butternut squashes, a flat of field tomatoes (more canning in my future) and a carton of peaches (the last of the season)! I also got a jar of local Keremeos Blackberry Honey and a bottle of local Black Cherry Fruit Vinegar.


While in Salmon Arm, I stopped at the famed DeMille's Farm Market and bought three blocks of Farmstead Artisan Cheese produced by The Village Cheese Company in Armstrong, B.C. (original home of the huge Armstrong Cheese company).

Sometime this week I plan to make Butternut Squash Apple soup and I might try to make some dried apple rings in the the food dehydrator. Any suggestions what I can do with the peaches, other than gobble them up whole?

Wednesday, September 22, 2010

Beet Hummus - Guest Post from Marianne


Today I have the pleasure of sharing a guest post by Marianne, of From French Fries to Flax Seeds. Marianne went to high school with me eons ago and last year, we reconnected over Facebook. Turns out she likes food as much as I do so we became Farmer's Market buddies! Marianne is training to be a registered dietitian, so along with having great recipes, she is also extremely knowledgeable about dietary health and nutrition. This may just be the longest post I have ever posted and include the most pictures, but is also one of the best! I cannot wait to make my own batch of beet hummus!

Beet It!
by Marianne of From French Fries to Flax Seeds

There are plenty of foods I may declare that I don’t like, but it’s not always true. It’s just easier to say “I don’t like (blank)” than to try and explain the situations in which I enjoy said food. Take tomatoes, for example. I often say I don’t like them, but I do eat them in things like salsa, ketchup, soups, stews, and of course Caesars ;) But tomatoes in salads or sandwiches, or in a pasta sauce? No thanks. I’ll pass. Because “I don’t like tomatoes”.

But this post isn’t about tomatoes. It’s about beets.

Check out the rest of Marianne's awesome post, mouth watering photos and great recipe for Beet Hummus after the jump.

Sunday, September 19, 2010

Caesar Vinaigrette


I made this easy dressing to top a simple Caesar salad for a family get together. Traditional Caesar dressings use raw eggs but one of my family members is expecting so she can't eat raw eggs. Another option is mayonnaise, but it's not my favourite condiment (and store bought mayonnaise is highly processed), so I try to avoid it. I found a simple blender Caesar dressing on Pioneer Woman so I used that as a guide and changed it up slightly. The result was a perfectly balanced, fresh and tangy dressing. It was way better than anything that comes in a bottle. Incidentally, this would also be a terrific as a baste for chicken!


2 whole cloves garlic
2 tablespoons plain Dijon mustard (not grainy)
1 1/2 tablespoons balsamic vinegar
Juice of 1/2 a lemon
1 teaspoon Worcestershire Sauce
dash of hot sauce
1/2 teaspoon salt
1 teaspoon pepper
1/4 cup fresh grated Parmesan cheese
1/2 cup good quality Extra Virgin Olive Oil

1. Add garlic, Dijon, balsamic vinegar, lemon juice, Worcestershire, hot sauce, salt and pepper to a blender.

2. Pulse on low a couple times until blended. Add Parmesan cheese and pulse a couple more times.

3. Add olive oil, a little at a time, and pulse once before adding more. When totally combined, pour into a glass jar or bowl and refrigerate prior to use.

My salad was made with a head of fresh romaine from the Farmer's Market. I added about three tablespoons of dressing, tossed it together, then added shaved Grana Padano and the Pioneer Woman's garlic croûtons, made using fresh country bread, also from the Farmer's Market. To finish it off, I added another tablespoon or two of dressing and tossed everything once more.

Friday, September 17, 2010

Stuffed Peppers - A Guest Post from my Cousin


I put the call out to some friends and family members for some guests posts. I've been a little swamped lately since going back to work after having most of the summer off. My cousin Tobe was the first to come to the rescue with Stuffed Peppers. Tobe doesn't have a blog but she loves to cook. She also guest starred in my post a few weeks back about Canning with Grandma. Without further ado...

Stuffed Peppers by Tobe

One of my fiancé's favourite Monday night football meals is "Stuffed Peppers". They are super easy to prepare and great to serve to all our hungry football fans. I decided to take a very basic stuffed peppers recipe and raise it a few notches to add some more flavour and take advantage of some fresh local ingredients.

I added 1 cup of shredded sharp white cheddar which gives a nice smokey flavour. Save a small handful to garnish the top; it makes a nice crusty gooey top on the peppers. If you can't fine sharp white cheddar, any cheddar will work. Instead if 2 cans of tomato sauce, I used 1 can and substituted the other for 1 jar of my Grandma's canned tomatoes. If you don't have canned tomatoes I would use 1 can of crushed tomatoes to give the sauce some texture. I combined organic ground beef and ground bison, instead of plain ground beef, to change the meat up a bit. Finally I added a few splashes of red wine to the meat mixture. It gave a little more depth and helped bring some more flavour to the dish.

Ingredients:

1/2 cup uncooked long grain wild rice
1 cup water
1/2 pound ground beef
1/2 pound ground bison
1 tbsp Worcestershire sauce
2 tbsp red wine (few good splashes)
6 green bell peppers
1 (8 ounce) can tomato sauce
1 (8 ounce) can crushed tomatoes
1/4 tsp garlic powder
1/4 tsp onion powder
1 tsp Italian seasoning
salt and pepper to taste
1 cup shredded sharp white cheddar (1/4 cup reserved for garnish)

Directions:

1. Preheat oven to 350 degrees F.

2. Place the rice and water in a saucepan, and bring to a boil. Reduce heat, cover, and cook 20 minutes.

3. In a skillet over medium heat, add meats, red wine and Worcestershire sauce and cook the beef and bison until evenly browned.

4. Rinse bell peppers and remove and discard the tops, seeds, and membranes. Arrange peppers in a baking dish with the hollowed sides facing upward. Slice the bottoms of the peppers if necessary so that they will stand upright.

5. In a bowl, mix the browned beef and bison, cooked rice, 1 can tomato sauce, 1 can crushes tomatoes, garlic powder, onion powder, cheese, salt, and pepper. Spoon an equal amount of the mixture into each hollowed pepper. Mix the remaining tomato sauce and Italian seasoning in a bowl, and pour over the stuffed peppers.

6. Bake 1 hour in the preheated oven, basting with sauce every 15 minutes, until the peppers are tender. During last 20 minutes of baking, top with remaining cheese.

Enjoy with a side salad and some hot crusty bread!

Wednesday, September 15, 2010

Pea Shoot, Tomato and Egg Salad


This is one of my favourites from The 10 Cent Diet. It's so fresh and simple. I eat it as a snack or as a salad with lunch. If you boil a few eggs in advance and keep them in your fridge, you can put this delicious salad together in a couple minutes.

Pea shoots, like all sprouts, are incredibly nutritious. They are super concentrated with nutrients - including seven times more vitamin C than blueberries, eight times more folic acid than bean sprouts and four times more vitamin A than tomatoes. (Source). Add a sliced garden fresh tomato and a perfectly hard boiled, free-range egg and you have a complete snack.

Serves 1

1 handful fresh pea shoots, cut in half
1 tomato, halved and sliced
1 (or 2) hard boiled egg(s), sliced
Balsamic vinegar
Sea salt (I use Fleur de Sel) and fresh cracked pepper

1. Layer pea shoots, tomato and egg in a bowl.

2. Top with a drizzle of balsamic and a sprinkle of salt and pepper.

If you're feeling extra fancy, used reduced balsamic vinegar. It's extra delicious that way. (Put 1 cup balsamic in a saucepan and simmer on low until volume reduced by half and balsamic is syrupy).

Tuesday, September 14, 2010

Skillet Sautéed Caramel Apple Crisp


I picked up some beautiful apples at the Farmer's Market the other day from Silverhill Apple Orchard. I was planning to make apple snacks in my food dehydrator but decided to postpone that task for another week. Instead I cooked up a tasty dessert that can be ready in about 25 minutes.

Serves 4

Skillet Sautéed Caramel Apples

2 apples - halved cored and sliced thin (Peel if you want; I didn't)
splash lemon juice
1/4 cup unsalted butter
3 tbsp sucanat
1 tbsp honey
2 tsp Apple Pie Spice (See below)
1 tsp vanilla extract

1. In a small bowl, toss together apple slices and lemon juice.

2. Melt butter in a cast iron skillet over medium heat. Add apple slices and stir to coat in butter.

3. Add sucanat, honey, Apple Pie Spice and vanilla. Mix together and let simmer, stirring occasionally, until apples are tender and a thick caramel sauce has formed.

4. Remove from heat and pour apples and caramel sauce into a glass or ceramic baking dish or individual ramekins. Set aside.

Crisp Oat Topping

1 cup rolled oats
1/2 cup whole wheat pastry flour
1/4 cup sucanat
1 tbsp honey
1/2 tsp salt
1/2 tsp Apple Pie Spice (See below)
1/2 cup unsalted butter, melted
1/4 cup chopped walnuts (optional)

1. Mix everything together in a medium bowl. Mixture should be moist. If too dry, add another tablespoon of melted butter.

2. Spoon mixture over top of sautéed apples and caramel sauce and press down so it is a compact, even layer.

3. Place baking dish in oven and broil on low for 2-3 minutes, until top is golden brown and crisp. (Don't burn it like I did!)

4. Allow to cool slightly before serving. Serve with vanilla ice cream!


Apple Pie Spice Mix

2 teaspoons ground cinnamon
1 teaspoon ground nutmeg
1/2 teaspoon ground allspice
1/2 teaspoon ground cardamom
pinch of ground cloves

1. Add everything to a Mason jar. Screw on lid and shake well to mix. Use within six months.

I also used my Apple Pie Spice Mix in Caramel Apple Pie Burritos!

Monday, September 13, 2010

My First Guest Post & Wild Mushroom & Garlic Crusted Steak


I was lucky enough to be asked by Kristen of Food Renegade to write a guest post for her blog. It was quite an honour, especially since I'm so new to the world of "Real Food". Kristen said she loved my photography and simple recipes and asked me to put together a grain-free, sugar-free recipe "for a tasty, but easy main dish". I was stumped at first. No grain? No sugar? But those are my two favourite things! In the end I stuck with my favourite, never fail, Red Wine Sautéed Mushrooms and a new one, Wild Mushroom and Garlic Crusted Steak. With flu season approaching I was planning on doing a new post about immunity boosters (see last year's), so I used this opportunity to plan a dinner around immunity boosting food. I was so excited about the project I had my post in to Kristen in just over 24 hours! The post is below or check it out on Food Renegade. The post and pictures look way better on her site! Enjoy and happy health!

P.S. This dish would be delicious with a bed of buttery mashed potatoes under the steak... or even better, horseradish spiked mashed potatoes!

Immunity Boosting Dinner

Autumn is just about here, summer holidays are over, kids are back in school, the weather is getting cooler and it’s beginning to rain more often. What does all this mean? Flu season is right around the corner! Along with the changing of seasons comes the onslaught of germs and viruses. I don’t get seasonal flu shots and can’t afford to be off sick from work, so this is the time of year I start super-charging my immune system by changing my diet to focus on “immunity boosting foods”.

It’s well documented which foods help boost immunity and fight off colds and flus. Prevention Magazine has a good list as does Yahoo! Health. My ultimate Immunity Boosting meal consists of a grass-fed sirloin steak for Zinc, Omega-3’s and Vitamins A & D, sautéed mushrooms for white blood cell support, and sautéed spinach and garlic for Vitamins A and C and bacteria fighting Allicin . Today I’m sharing recipes for a Wild Mushroom & Garlic Crusted Steak with Red Wine Sautéed Mushrooms. Pair with a side of simple sautéed spinach and a glass of antioxidant rich red wine, and it’s a complete meal with great health benefits. This dish would also be delicious with a bed of buttery mashed potatoes under the steak!

Prep Tips: Start the mushrooms first. While the mushrooms are browning, put together the Wild Mushroom & Garlic mixture and coat the steaks. After you turn the steaks once (Steak Step 3), add red wine to the mushrooms (Mushroom Step 3) and let simmer on low while steaks finish cooking and resting (15 minutes). Start cooking the spinach 5 minutes after you have placed the steaks on a plate to rest. Everything should be ready when the steak rest period is up.

The Barefood Contessa has a very simple, tasty sautéed spinach recipe. Check it out here.


Mushroom & Garlic Crusted Steak

4 Small Grass-Fed Steaks (Sirloin or Strip Loin work best)
14g Dried Wild Mushrooms, about 0.5 ounces by weight, (I used a mixture of Porcini, Chanterelle, Shitake, Lobster & Oyster mushrooms.)
1 tsp Whole Mixed Peppercorns
1 tsp Sea Salt
1/2 tbsp Dehydrated Minced Garlic (preferably Roasted Garlic, if you can find it)
1 tbsp Dehydrated Minced Onion
1 tbsp Fresh or Dried Chopped Parsley
4 Cloves Fresh Garlic, Minced
2 tbsp Olive Oil, Divided

1. Add mushrooms and peppercorns to a spice grinder or food processor and grind until you have a course powder. Place mixture in a small bowl. Add salt, minced garlic, minced onion and parsley. Mix together. Add fresh garlic and 1 tablespoon of olive oil. Stir mixture together to form a thick paste.

2. Place steaks on a plate and brush with a bit of olive oil. Press mushroom mixture onto each steak to coat. Turn steaks and do the same with the other side.

3. Heat a cast iron fry pan over medium-high heat. Add 1 tablespoon of olive oil. When pan and oil hot, add steaks to pan, two at a time if pan is small. You can also cook the steaks on the grill, if you prefer. Sear for 4-5 minutes per side, then move steaks to a plate and cover with foil to rest while you cook the other two. Let steaks rest 10 minutes before cutting.

Red Wine Sautéed Mushrooms

1 lb White Button or Brown Crimini Mushrooms
1/4 cup Unsalted Butter
Splash of Olive Oil (to keep butter from burning)
1/3 cup Dry Red Wine
Salt & Pepper to Taste

1. Brush or lightly rinse mushrooms to remove any visible dirt. Cut mushrooms in half or into quarters if they are very large.

2. Heat butter and olive oil in a sauté pan over medium heat. Add mushrooms and sauté until reduced, browned and tender.

3. Reduce heat to medium-low and add red wine. Simmer, stirring occasionally, until wine has reduced, about 15 minutes. Season with salt and pepper. Spoon mushrooms onto plate beside steak and drizzle some extra sauce over the steak.


Sunday, September 12, 2010

Local Eating - Fall Foods


It's nearly Fall, my favourite season. Fall marks the birthday celebrations of my mother, sister, uncle, two grandfathers, niece, cousins and brother-in-law... oh yea and my own! I love fall fashion (sweaters & boots!), fall weather and fall colours. Most of all, I love fall food!

According to Get Local BC, the following is available locally this Autumn:

Vegetables: Artichokes, beans (fresh & dried), beets, broccoli, cabbage (green, savoy & red), carrots, cauliflower, celery, chard (swiss), corn, cucumbers, fennel (bulb), garlic, kale, leeks, lettuce, mustard greens, onions (red & yellow), parsnips, peppers, pumpkins, potatoes (red, russet, yellow, white), radishes, rutabagas, salad greens, shallots, spinach, squash (winter), tomatoes, turnips (white), zucchini

Fruit: Apples, crab apples, cranberries, grapes, melons, pears, plums, prunes, strawberries

Meat & Dairy: Dairy Products, eggs, beef, buffalo, chicken, duck, goat, lamb, ostrich, pork, rabbit, turkey

Seafood: Clams, cod (Pacific), crab, Dungeness crab, flounder/sole (Pacific), halibut (Pacific), mussels, oysters (Pacific), prawns (jumbo), sablefish (black cod), salmon (Chinook/King/Spring/Pink/Chum/Coho), sardines (Pacific), scallops, shrimp (side stripe, west coast), Spring dogfish, Tuna (Albacore)

Herbs: Basil, bay leaves, chervil, chives, cilantro, dill leaf, dill seed, epazote, fennel leaf, fennel seed, garlic chives, lemon grass, lemon verbena, sweet marjoram, mint, oregano, parsley, rosemary, sage, savory (summer & winter), shiso, sorrel, tarragon, thyme

Etc: Honey, mushrooms, nuts

And now... I'm off to the Farmer's Market! Happy Sunday!

Saturday, September 11, 2010

Oysters on the Half Shell with Pickled Shallot Vinegar


It's week four of my online cooking class, Surf & Turf at Cheeseslave. This week, Ann Marie taught us how to pick fresh seafood and we learned several recipes for uncooked seafood dishes, like ceviche and sashimi. She also showed us a great way to shuck raw oysters.


Oysters are extremely good for our health and are listed in The 150 Healthiest Foods on Earth. According to author Johnny Bowden, a 1 cup serving of oysters supplies more than 100 percent of the recommended daily value of Zinc. Zinc is important to healthy immune function and fertility, among other things. Oysters are also a mood elevator as they are rich in the amino acid tyrosine, which the brain converts to dopamine. Before dealing with raw oysters at home, make sure you read up about how to buy and store fresh shellfish. Raw oysters are safe to eat, if handled properly.


A few weeks ago, I ordered an oyster knife online from Golda's Kitchen, in anticipation of this lesson. Yesterday I picked up 8 small fresh oysters from the market and today I got down to business! I was pretty apprehensive about the process. Not sure if any of you have seen Bob Blumer's Glutton For Punishment? He participated in an "Oyster Shuck Off" in one episode. Let's just say there was a lot of blood. As it turns out, oyster shucking is not that hard, or that dangerous! Actually, it's incredibly easy. I made it through my eight in under 10 minutes, and had only minor difficulties with two of them. But... this post isn't about how to shuck oysters. I am certainly no expert. There are loads of videos on YouTube that can help you out. All I can tell you is to make sure you have a proper oyster knife, a sturdy wooden cutting board, a clean dish towel and a steady hand! And DON'T STRESS! And if someone tells you a butter knife will work just fine to shuck an oyster, DO NOT BELIEVE IT. You need an oyster knife. You can pick one up at most any kitchen supply or speciality shop for about $10.

OXO Good Grips Oyster Knife

I love topping my raw oysters with a squeeze of fresh lemon, a dash of Tabasco, a little bit of grated fresh horseradish or pickled shallot vinegar - but not all together! I made the Pickled Shallots during week three of the Preserve the Bounty Challenge. French Food at Home does a pickled shallot on fresh oysters. My favourite seafood restaurant, Rodney's Oyster House also serves their fresh oysters on the half shell with a pickled shallot vinegar. It's delicious! Pickled shallots are also a great condiment for many other things, like salads, sandwiches, antipasti platters, meat and poultry!


Pickled Shallot Vinegar

2 large shallots
1 1/2 cups red wine vinegar
1/2 cup sugar
1/2 tsp salt
1 sprig fresh thyme

1. Peel shallots and slice thinly.

2. In a medium saucepan, mix together vinegar, sugar and salt. Bring to a boil, stirring often to dissolve sugar. Add shallots and stir.

3. Bring to a simmer and cook for one minute. Add thyme sprig. Remove from heat and let cool at room temperature.

4. Transfer mixture to a glass canning jar. Cover and refrigerate for at least one week before using. Can be stored in the refrigerator for up to two months.

Alternatively - if you want to heat process your canned shallots for shelf stable storage, complete the directions up to step 3, but do not let the mixture cool. Pack shallots into cleaned and sanitized jars with a small sprig of thyme. Fill with hot vinegar mixture to 1/2 inch below the rim. Cap your jars and process in a water bath canner for 10 minutes.


Friday, September 10, 2010

Lemony Seafood Pasta


Summer is nearly done. Holidays are over, the days are getting shorter, the weather cooler and the rain is falling. Soon we will be cooking butternut squash soup and crock pot roasts. In the meantime, keep the spirit of summer around a little longer with a light, simple and fresh pasta dinner.

I threw this together quickly before heading out to work one night. I put it in a pyrex "to go" container and snapped a picture. It tastes better than it looks!

Serves 2

10 ounces of penne, linguine or fettuccine, cooked according to package directions and drained
1 tbsp olive oil
1 small shallot, diced
6 cloves garlic, minced
1/2 cup chicken broth
1/3 cup white wine
Juice and zest of 1 lemon
1/8 tsp salt
2 tsp freshly ground black pepper
10 large shrimp, peeled & de-veined
10 large sea scallops
3 tbsp butter
8 cherry tomatoes, cut in half
handful of fresh chopped parsley and basil
fresh grated Parmesan

1. Heat oil in a large saucepan over medium heat. Add shallot and sauté until starting to turn translucent. Add garlic and sauté for another minute.

2. Stir in chicken broth, wine, lemon juice, lemon zest, salt, and pepper. Reduce heat and simmer until liquid is slightly reduced.

3. Add shrimp and scallops to sauce pan. Cook 2 to 3 minutes, turning seafood half way through, until shrimp and scallops are cooked and opaque.

4. Remove pan from heat and add butter. Stir until melted and sauce is thickened. Toss in tomatoes and cooked pasta. Sprinkle fresh herbs over top and toss gently to incorporate.

5. Divide evenly between two plates and sprinkle with more fresh herbs and fresh grated Parmesan cheese.

This post is part of Fight Back Friday @ Food Renegade.

Thursday, September 9, 2010

Why Choose Local?

(Please disregard that this video is sponsored by Hellman's)


Why do you choose local?

Wednesday, September 8, 2010

Community Gardens


The little island where my mother owns a vacation cabin, is home to the most amazing community garden. It's called D.I.G.S. (Douglas Island Garden Society) and is funded completely by donations (the initial funding came from a City grant) and worked on completely by local islanders volunteering their time and hard work.


My mom even donated an old potting shed that was on her property and it now stands, freshly painted at the front of the D.I.G.S. Community Garden. The Garden gate is never locked and everyone is welcome to come in, walk around and enjoy the garden. Sunflowers, tomatoes (including heirloom), squash, carrots, berries, rhubarb, chard, lettuce, herbs, onions, beans, hot peppers... they grow it all in abundance and with great success.


Every Sunday from 10am-12pm, fresh produce is available at the little stand (Anna's Store) for free or by donation. The other day I got a bunch of celery, fresh picked that morning, with all the leafy tops still attached. My cousin got fresh green beans and my other cousin got poppy seeds. We dropped a few loonies and toonies ($1 and $2 Canadian coins) in an old rubber boot and off we went with our goods.

D.I.G.S. is an amazingly successful and impressive community initiative. Across the country, more and more, city leaders and stakeholders are embracing the community garden concept and are donating city land for use as garden space. There are many reasons to support community gardens. Along with providing local residents access to fresh, local produce, community gardens also increase the sense of community and belonging for those working in the garden as well as those living in the area. This is no more apparent then on the island where D.I.G.S. operates. Each Sunday morning the local islanders meet up at the Garden to exchange produce, share stories, work in the dirt and interact. They also have a children's program where kids learn about gardening and participate in craft activities. In the Summer a "Garden Walk" is organized, where islanders tour each other's gardens, giving the "green thumbs" a chance to showcase their hard work and the others a chance to enjoy it. Afterwards, they all get together at someone's house for a barbecue. I have always been amazed and impressed with how a simple garden can do so much to bring people together.

Urban community gardens also provide much needed green space in an otherwise sparse urban landscape and help to beautify neighbourhoods. An old gas station lot at the corner of Burrard and Davie, in the heart of Downtown Vancouver was recently turned into a thriving community garden. Another one has been operating for years on a stretch of old decommissioned train track off Fir Street in Kitsilano.

Along with neighbourhood beautification, some also believe that areas with community gardens have lower instances of crime, particularly with regards to vandalism, because the area residents take more of an interest in their neighbourhoods (the same is true for areas with organized Neighbourhood Associations). (Source). Alternatively, other studies have indicated that while community gardens do not actually impact crime rates, area residents perceive their neighbourhood as safer because of the presence of the gardens. (Source). Regardless of studies and stats, the fact is, community gardens are good for neighbourhoods, cities and area residents.

Check here to find a Community Garden in your neighbourhood (Greater Vancouver only) and do what you can to take part! Get involved, volunteer, donate. Do what you can to support these great community programs. If your community does not have one and you want to take part, contact your City Hall parks department to get the ball rolling! Check this post on how to start a Community Garden, including tips on how to secure land and sponsorship and how to organize your garden society.

For more on Community Gardens, check here.

Tuesday, September 7, 2010

Canning with Grandma

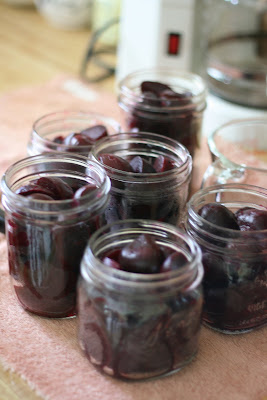
Last week I joined my cousin and my Grandmother for a lesson on beet canning. My Grandma is an expert in home canning. Every year she cans beets, tomatoes, peaches salmon, jams, pickles... you name it! The Pickles in a Bucket recipe came from her. She also makes THE best canned tomatoes. They are perfect for a quick, homemade tomato sauce and even better for tomato soup. Pictures from tomato canning will come at a later time, along with Gram's recipe. Right now, it's all about BEET PICKLES!


Grandma's recipe book


Beet Pickles (Click to enlarge to see her brine recipe).


Grandma doesn't believe in using rubber gloves. I think she even rolled her eyes at me when I asked where here gloves were.


Cousin Tobe learning from the best.


Grandma hasn't bought new canning jars in years!


Canned beet pickles!


Fresh out of the water bath canner.


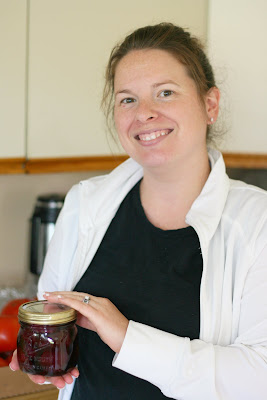
Cousin Tobe with her finished product!

After letting the jars rest overnight, then removing the rings, the beets are shelved for at least a month before enjoying. Tobe says she eats the pickled beets as a snack, right out of the jar or chopped up on salads. You can add them to a veggie or antipasti platter for a delicious party treat! The finished Beet Pickles are so delicious - not too sour and not too sweet. They are the perfect mix.

This post is part of Twister Tuesdays at GNOWFGLINS.

Monday, September 6, 2010

Make the Switch - How to Shop Local


Kits Beach, Vancouver

A few months ago, I posted about what it means to be local and just last week I posted some resources for locally and humanely raised animal products. I think I skipped a step in there though, so now it is time to talk about how to make the switch to locally grown and produced products.

Get Local BC suggests you start small. Begin with one or two of the foods you buy the most, rather then an entire food group. Find local sources for the products and compare prices to find the best supplier for your needs and wallet. Once you have made the switch to one or two local items, do the same with a few more items until you have local sources for much of your fresh food supply.

Granville Island Market, Vancouver


Other tips to help you shop and eat local:

- First, define what "local" means to you. Revisit my post about what it means to be local. Do you want products produced and growth within Canada, within your Province, or within your regional area?

- Avoid large, chain grocery stores. These grocery stores carry very little local produce (if any at all), and often what they do carry is not as fresh as you would get elsewhere. There are some exceptions, of course so check the produce department of your local grocery store to see what locally grown products they offer. The best alternative is to shop your local, independent grocer or your local organic/natural foods grocer.

- Learn what products are "in season" each month, before you go shopping. Not everything is available year round. Eating local means eating in season. Check Get Local BC's Seasonal Chart or my posts on Spring, Summer, Fall and Winter foods. (Lists applicable to BC and Pacific North West region only. If you live in other area of the country, go to Google to find an "in season" chart for your area.)

- When starting the switch to local, don't worry about organic. If you can find local AND organic produce, GREAT! If not, think about what is more important to you, based on your food philosophies. Some people feel better about eating organic. Some feel better about eating local. Again, both would be ideal but sometimes it is not possible. I tend to buy local over organic, especially in the Summer during market season. Come fall & winter I tend to buy organic in the stores. Check my post about whether or not to buy organic before you make your choices.


- In the Spring and Summer, visit your community Farmer's Market. The produce is picked at the peak of freshness and brought to the market for you to buy, direct from the grower. Roadside farm stands are also a great choice!

- In the off season, visit independent produce markets, like Kins Farm Market or sign up for a home delivery service like Spud.ca or Organics@Home.

- If you live in British Columbia, buy Hot House. BC Hot House is 100% owned by local growers. BC Hot House tomatoes, cucumbers and bell peppers are sold around the world. We are lucky enough to have them based and grown, right in our backyard, with farms in Surrey, Abbotsford and Ladner. Just watch out for their other label MX Hot House. Those products are grown in Mexico during the winter months when there isn't enough light to adequately grow greenhouse produce here.

- Read labels and signs to know where your food is coming from. Not all produce at your local, independent grocer or produce markets is local. Kins carries a huge selection of produce from California. Just the other day I bought Californian plums because I wasn't paying attention. If you aren't sure, ask questions. You have a right to know where your food is coming from.

- Plant your own garden and grow the items you tend to purchase the most. If you don't have space for an outdoor garden, consider a container garden. This year I planted a large container herb garden, container lettuce and container tomatoes. Several cities now have community gardens as well.


- Preserve the Bounty! This summer I participated in The Nourished Kitchen's Preserve the Bounty challenge and preserved over 12 litres of in season fruit and produce for use in the winter months. I bought a food dehydrator and dried fresh herbs and in season fruit. Along with canning, drying, fermenting and vinegar preserving, you can also freeze some foods for use during the off season.

- If you can afford it and have the freezer space, buy your meat products in bulk. Buy a half or a quarter of a cow direct from the farmer. You will save money and time as you won't need to return to the farm or other vendors every few weeks or months to re-stock. With local beef and poultry readily stocked in your freezer, you won't be tempted to buy lesser quality meat of unknown origin from the grocery store. (Ann Marie at Cheeseslave says it takes 7 cubic feet of freezer space to store half a cow.)

- Adjust your cooking focus to be in line with seasonal food. In the summer, cook with beets, corn, green beans, zucchini and berries. In the Fall, try Brussels sprouts, parsnip, cauliflower and pears. In Winter, stick with apples, carrots, onions, butternut and other winter squashes. In the Spring enjoy asparagus, rhubarb and BC Spot Prawns.

- Realize that buying local doesn't mean giving up foods you love. Certain foods like citrus fruit, are not available at any time in British Columbia. Buy local when you have the choice but don't feel like you have to give up locally unavailable foods. Instead, buy from your local produce market to ensure you are getting the freshest produce possible and buy organic when possible. For pantry staples like soy sauce, sugar, coffee, rice, olive oil etc, buy high quality, un-refined and organic when possible.

For more information:

Get Local BC has produced a directory, mainly aimed at residents in the City of Vancouver. It has lots of good resources about where to shop for local products.

Eat Wild Canada has an extensive list of sources for grass-fed beef and other humanely raised animal products.

Check my post about local vendors and resources for locally and humanely raised animal products, such as dairy, meat, seafood and poultry.

This post is part of Monday Mania at The Healthy Home Economist

Sunday, September 5, 2010

Cleaned Up Cream Cheese Brownie Cake


This recipe comes from an old cook book called So Fat, Low Fat, No Fat by Betty Rohde. I used to make this all the time when I was in college. It's already a pretty good recipe but I wanted to clean it up to eliminate the refined ingredients and make a few substitutions for things like fat-free mayonnaise and light corn syrup (yuck)!

Cake:

1 1/2 cups whole wheat pastry flour
1 cup unrefined golden cane sugar (I use Cuisine Camino brand)
1/2 tsp baking soda
1/4 cup unsweetened cocoa powder
1/8 tsp salt
1/4 cup plain Greek yogurt
2 tbsp honey or agave syrup
1 tsp vanilla extract
1 cup warm water

Cream Cheese Swirl:

1/3 cup cream cheese, at room temperature
1 1/2 tbsp unrefined golden cane sugar
1/2 tsp vanilla extract

1. Heat oven to 350 degrees and lightly grease a 9 inch square baking dish.

2. In a large bowl combine flour, sugar, baking soda, cocoa and salt. Stir until blended. Add yogurt, honey, vanilla and water. Mix with an electric mixer until smooth. Pour batter into greased baking pan and set aside while you prepare the cream cheese topping.

3. In a small bowl. combine cream cheese, sugar and vanilla. Mix together until smooth and creamy. Drop about 1 tablespoon of cream cheese mixture into 4 or 5 places on top of the cake batter. Place the tip of a butter knife into the centre of each cream cheese dollop and drag the cream cheese around to make swirls on top of the cake.


This is my swirl after baking. It sucks. Sometimes it takes some practice, and it helps if your cream cheese is really soft and creamy!

4. Bake for 40-45 minutes in pre-heated oven until cake is springy to the touch and a toothpick inserted in the centre comes out clean. Let cool, then cut into squares. Serve with melted Toblerone Fudge Sauce.

This post is part of Slightly Indulgent Tuesdays at Simply Sugar & Gluten Free.
Saturday, September 4, 2010

Lemon Blueberry Spelt Crumb Cake


This post was done in advance because I am out of town and today is my birthday!!

I'm trying to finish off the last of a 5 pint container of blueberries. I've frozen plenty, dehydrated some and preserved some more in alcohol. Tomorrow I have a date with my Grandma and Cousin to can some beets! I can't show up empty handed so this cake is perfect. For someone who hates baking, I have been doing an awful lot of it lately!

Adapted from Canadian Living

1 1/2 cups fresh blueberries
2 tbsp whole wheat flour
2 1/4 cups spelt flour
1 tsp baking soda
1 tsp baking powder
1/4 tsp salt
3 whole eggs
2/3 cup unrefined cane sugar (I use Cuisine Camino Golden Cane Sugar)
2/3 cup butter, melted
1 tsp vanilla extract
zest from 1 lemon
2 tbsp fresh lemon juice

1. Pre heat oven to 325 degrees. Lightly grease an 8 inch square baking pan and line with parchment paper.

2. In a small bowl toss together blueberries and 2 tbsp of whole wheat flour. Set aside.

3. In a medium bowl, add spelt flour, baking soda, baking powder and salt. Whisk together to mix well.

4. In a large bowl, whisk eggs and sugar together until well blended and creamy. Stir in melted butter, vanilla, lemon zest and lemon juice. Mix well.

5. Gradually add flour mixture into liquid mixture and stir together until blended and smooth. Gently fold in blueberries. Pour mixture into prepared baking pan.

6. Bake in pre-heated oven for 50 minutes or until golden brown on top and a toothpick inserted in the centre comes out clean. Remove from oven and leave cake to cool slightly in the pan, then remove and finish cooling on a rack.

Friday, September 3, 2010

Homemade Granola Bar Makeover


I found this recipe for healthy homemade granola bars. How health is it when it uses refined brown sugar, all-purpose flour and vegetable oil? Gross, gross and gross. I was going on a little weekend vacation with my cousin and her baby and I wanted to bring homemade granola bars along for a snack. My goal was to re-vamp the recipe using non-refined ingredients and eliminate the eggs since my cousin's son is allergic to them. Flax seed meal is a great egg substitute for baking; One tablespoon of ground flax meal mixed with two tablespoons of water is the equivalent of one egg.

2 cups rolled oats
3/4 cup sucanat
1/2 cup wheat germ
1 cup whole wheat flour or spelt flour
1 cup raisins, dried cranberries, sunflower seeds, shredded coconut, raw cocoa nibs (any combination of things to equal 1 cup - I used a bit of everything!)
3/4 tsp sea salt
1/2 cup honey or maple syrup
1 tbsp ground flax seed meal mixed with 2 tbsp water
1/4 cup coconut oil, melted
2 tsp vanilla extract

1. Preheat the oven to 350 degrees F. Grease a square or rectangle baking pan and line the bottom with parchment paper.

2. In a large bowl, mix together the oats, sucanat, wheat germ, cinnamon, wheat flour, raisins, cranberries, cocoa nibs, shredded coconut and salt. Make a well in the centre, and pour in the honey, flax, coconut oil and vanilla. If it is very dry, add a bit of water, a tablespoon at a time. Mix well using your hands if needed. Pat the mixture evenly into the prepared pan.

3. Bake for 30 to 35 minutes in the preheated oven, until the bars begin to turn golden at the edges. Cool for 5 minutes, then cut into bars while still warm. After cutting, let cool completely, then store in an airtight container.


Thursday, September 2, 2010

Bison Bean Burritos with Homemade Refried Beans & Guacamole


I'm going away for a few days so my fridge is a little bare. This is where creativity comes into play so I can get a wholesome dinner, made with real food, on the table. I pulled some bison ground out of the freezer, found a can of Eden Organics pinto beans in the cupboard, bought a couple avocados at the market yesterday and plucked three ripe tomatoes from my tomato plant. A mish mash Mexican meal is in the works. Bison and bean burritos, with fresh Pico de Gallo and Guacamole.

Step 1: Dice up some Pico

Make your Pico de Gallo using this recipe. Improvise for ingredients you don't have. As long as you have tomatoes, you can whip up a simple Pico.

Step 2: Make the beans

Homemade Refried Beans

-1 can organic black or pinto beans, drained (but not rinsed)
-1/4 cup fresh Pico de Gallo or other fresh salsa
-1 tbsp pickled jalapeño or banana peppers (optional)
-1 tbsp bacon fat (optional - but adds great flavour!)

1. Add the first three ingredients to a bowl and mix together. Using an immersion blender, quickly blend together the beans and salsa, leaving a chunky texture.

2. Add bacon fat to a heated cast iron frying pan, then pour in beans. Cook on medium-low, stirring occasionally, while you prepare other dishes. Season with salt and pepper, to taste, before serving.

Step 3: Prepare the Guac

Guacamole

2 ripe avocados
1/4 cup Pico de Gallo
salt & pepper to taste

1. Cut avocados in half and scoop flesh into a bowl. Add Pico de Gallo and mash together using a fork or small masher. Season with salt and pepper to taste. If you have a fresh lemon or lime you may want to add a splash of juice as well.

Step 4: Cook the meat

Bison Burrito Meat

1 lb ground bison meat
2 tbsp Jill's Mexican Seasoning or other homemade Mexican or taco seasoning blend.

1. Add a bit of olive oil to a sauté pan and heat over medium-high. Add bison and cook until starting to brown. Break apart larger pieces with spatula.

2. Add Mexican seasoning and a couple tablespoons of warm water. Stir together. Reduce heat slightly and simmer until meat is cooked through.

Step 5: Assemble


Whole Wheat Tortilla Shells
Prepared ground bison
Prepared refried beans
Prepared guacamole
Prepared Pico de Gallo
Shredded cheddar cheese (optional)
sour cream (optional)

1. Lay a tortilla shell on a plate and layer fillings of your choice down the centre of the tortilla. Fold tortilla into a burrito and serve with more sour cream, guacamole and Pico de Gallo on the side. Alternatively, if you don't want to use tortillas or don't have them on hand, layer your ingredients in a bowl for a Mexican Fiesta Bowl. Also very delicious!

Related Posts with Thumbnails